To fix a turntable that sounds muffled, start with the record, then the stylus, then the tracking force. In that order. A dull, underwater sound almost never means you need a new cartridge, and swapping parts before you check the setup is the most common way people waste money on a problem a free adjustment would have solved. Budget about an hour for the full pass.
Before the hour, here is the fast triage. If the sound is muffled on every record, the turntable is at fault. If it is muffled on one record and clean on another, the record is at fault. If the bass is missing and the treble sounds harsh, you are probably on the wrong input. If the sound only falls apart in the last three minutes of a side, look at the cartridge mounting and the inner grooves.
The rest of this guide walks the diagnosis in order, from the cheapest fix to the most expensive.
Table of Contents
- What You Need
- Step-by-Step
- Step 1: Rule Out Dirty or Damaged Records
- Step 2: Clean the Stylus and Tonearm
- Step 3: Check the Cartridge and Stylus Condition
- Step 4: Confirm the Cartridge Is Properly Mounted
- Step 5: Set the Correct Tracking Force
- Step 6: Adjust the Anti-Skate and Tonearm Alignment
- Step 7: Inspect the Electronics and Connections
- Step 8: Test the Turntable on a Known-Good Setup
- Common Mistakes
- Frequently Asked Questions
- Can a dirty stylus make a turntable sound muffled?
- Will replacing the stylus fix a muffled turntable sound?
- What is the correct tracking force for a turntable?
- Is it safe to clean vinyl records with rubbing alcohol?
- Why does my turntable sound dull on some records but not others?
- When should I take a turntable to a repair technician?
What You Need
Most of the fixes below need a small kit and about ten minutes. Unplug the turntable before you put a hand anywhere near the tonearm or the rear panel, and only plug it back in once the arm is back on its rest.
- Soft record brush — a nylon-bristle brush you sweep along the groove, not across it. Essential.
- Record cleaning fluid — a purpose-made vinyl fluid plus a lint-free cloth, or a carbon-fibre brush for routine groove cleaning. Household products are not a substitute.
- Stylus cleaning brush — soft camel hair, used only on the stylus itself. A clean nylon record brush will do in a pinch.
- Stylus magnifier — a 10x loupe or the supplied microscope. You cannot see stylus wear without one.
- Tracking force gauge — a digital or dial VTF gauge. Cheap, and it takes the guesswork out of Step 5.
- Cartridge alignment protractor — a printed template for the manufacturer’s pivot point. Optional until Steps 4 and 6.
- Spirit level — or the phone level app if your phone has a sensor good enough for the job.
- Headphones or a second amplifier — optional, and the fastest way to split the problem in half at Step 8.
- Small external phono preamp — optional. A cheap one turns the receiver question from a guess into a test.
- Replacement stylus or cartridge — optional, and the last thing you buy, not the first.
Step-by-Step
Step 1: Rule Out Dirty or Damaged Records
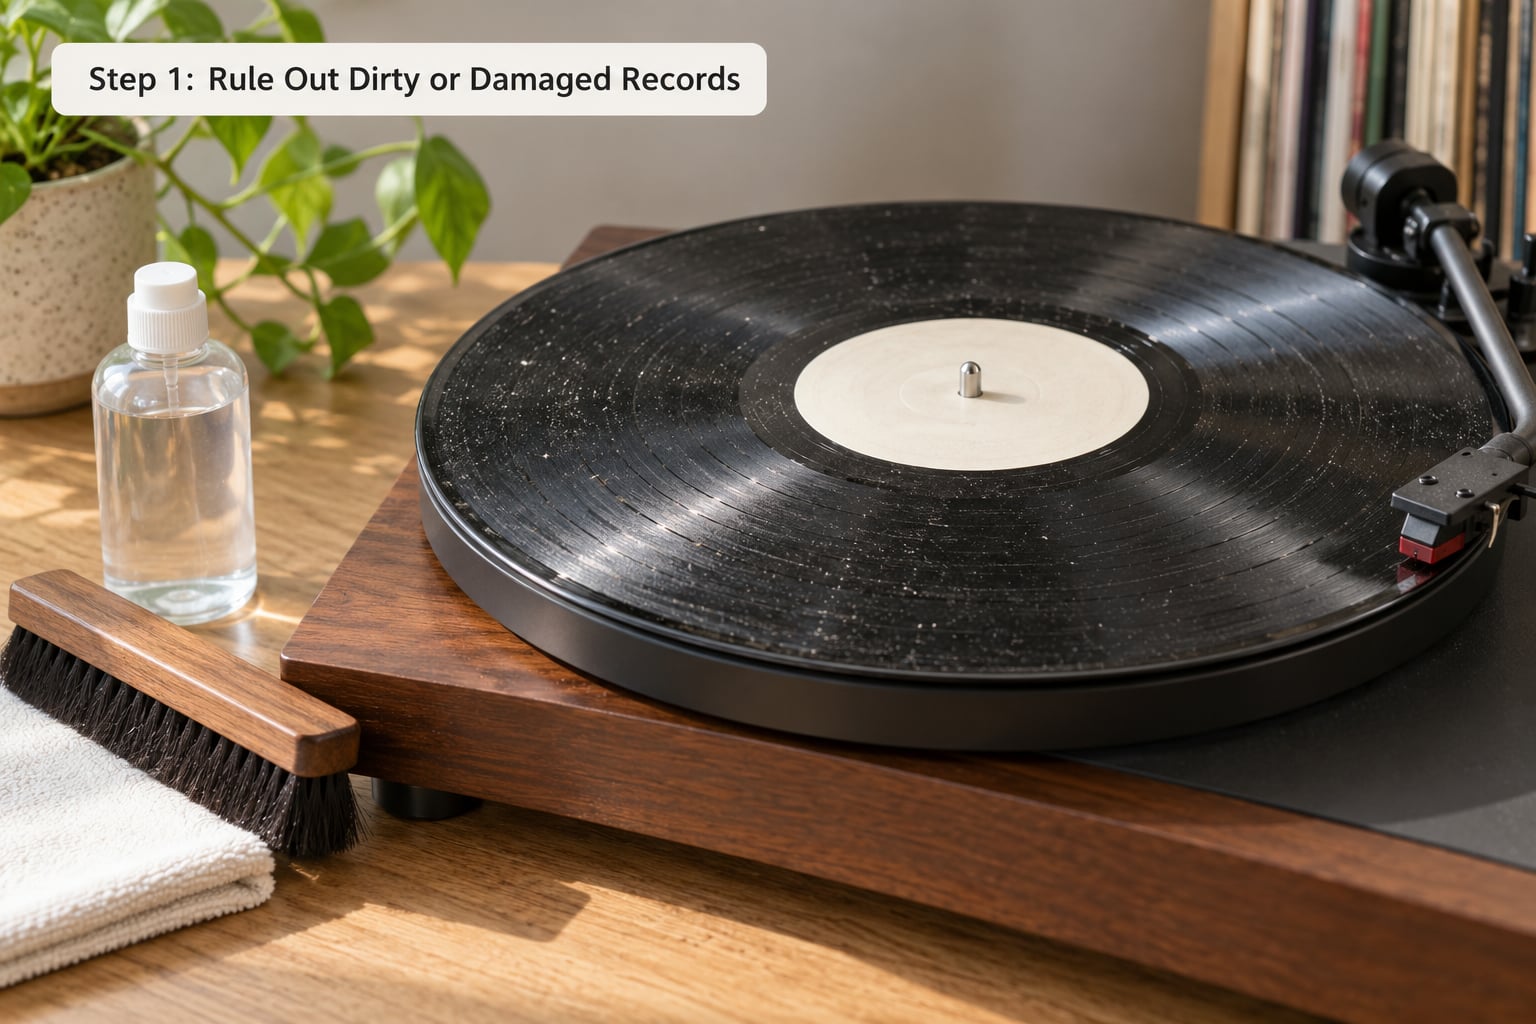
Play three or four records, not one. Pull from different eras and different labels, and include a record you know sounded good the last time you played it. A record that is clean on every deck and a deck that is clean on every record are two very different problems.
Hold a record up to a lamp and turn it slowly. Radial scuffs from the sleeve are harmless. What matters is a scratch that crosses the playing surface from edge to edge, a gouge, a dent, or a warp you can see as a wobble when the record rotates on the platter. Radial scratches are audible as a brief click and then nothing. Circular scratches stay in the groove and dull everything after them, which reads as muffled.
Clean the suspect record with the brush first, following the groove from the outside in with light pressure. If it is sticky, oily or has been stored badly, add a few drops of proper record fluid and wipe with a lint-free cloth using the grain of the vinyl. Play it again. If the improvement is obvious, your collection is the problem, and a cleaning routine settles it.
Step 2: Clean the Stylus and Tonearm
A gummy stylus collects dust and turns it into a plough on every pass. Unplug the deck, lift the arm, and look at the stylus under magnification. You want a clean, sharply defined tip sitting centred in the groove.
Brush the stylus with the soft brush, pulling from the front of the cantilever to the back, in line with the arm’s movement. Two or three strokes is plenty. Never push sideways, never scrub, and never touch the cantilever with a finger — the oil on your skin is enough to change the geometry.
While you are there, clean the headshell and the inner edge of the record where the arm lands, then confirm the stylus guard is off and the transit screws on the plinth are removed. A stylus guard left on gives you silence that people often describe as muffled; transit screws left in place let the platter wobble. Check the arm wire connector is seated fully in the headshell too.
Step 3: Check the Cartridge and Stylus Condition
Under 10x magnification, a healthy stylus is a small bright point sitting in the middle of the cantilever. Worn tips look blunt, flattened or visibly wider than they should. A bent cantilever sits at an angle, and a broken tip may be missing entirely.
The other failure is a loose stylus inside the cartridge body. Some cartridges have a removable tip held in place by glue or a tiny screw; when it shifts, the tip no longer lines up with the cantilever and the output drops sharply, usually with one channel quieter than the other. If the body is cracked or the cantilever is bent, stop using it.
Replacement makes sense here and only here. Most moving magnet cartridges accept a fresh stylus, and that single part fixes a genuinely worn needle. Moving coil styli are usually not user-replaceable, so the whole cartridge goes. Generic no-name replacement styli are a gamble — the tip shape and suspension rarely match what the cartridge body expects, and collectors on vinyl forums report plenty of cases where one made the tracking worse.
Step 4: Confirm the Cartridge Is Properly Mounted
Loosen the two cartridge screws in the headshell just enough to lift the body, then reseat it. The body should sit square to the headshell, with the coloured dots on the pins matched on both sides, and the finger posts aligned with the mounting holes.
Tighten the screws alternately, a few turns each, until they are firm plus a fraction. Over-tightening cracks the body or strips the plastic post; under-tightening lets the cartridge shift the first time the arm meets a damaged record. Wiggle the body gently after tightening; it should not move at all.
A crooked or loose cartridge plays dull and thin, often with a touch of treble sibilance on top, because the stylus is not perpendicular to the groove walls. Compare left and right by eye. If the coloured dots do not line up or one pin sits at a different depth, that mismatch alone can make the sound seem lopsided and veiled.
Step 5: Set the Correct Tracking Force
Tracking force is the downward pressure the stylus puts on the record, measured in grams, and getting it wrong is the most common cause of a thin, muffled signal. The procedure matters more than the number.
- Set the tracking force dial to zero and set anti-skate to its minimum.
- Lift the arm and let it float over the record. Adjust the counterweight until the arm neither rises nor drops, level with the armrest.
- Set the dial to the manufacturer’s figure for your cartridge. Moving magnet cartridges typically run 1.5 to 2.5 grams; moving coil cartridges usually need 1.8 to 2.5 grams.
- Place the tracking force gauge on the record and lower the arm onto it. Match the dial to the reading.
- Set anti-skate to the same number as the tracking force, then recheck the gauge after the change.
Too little force and the stylus fails to stay in the groove on the quiet and high passages, so the sound goes thin and the treble gets sharp and splashy. Too much and the stylus is jammed into the groove, which compresses the top end and wears both the needle and the record faster. Confirm the fix by playing the same record you used to test the problem: a correctly loaded stylus holds clean bass right to the run-out groove.
Step 6: Adjust the Anti-Skate and Tonearm Alignment
Anti-skate is the force that stops the arm’s pivot drag pulling the stylus toward the centre of the record. Set it to the same number as the tracking force as a starting point, then lift the arm and check that it does not creep inward on its own.
Next, check alignment with a protractor. Put the template over the record with its origin on the manufacturer’s stated pivot point for your arm, swing the arm across the two marks, and read where the stylus sits. Cartridge manufacturers publish both the origin distance and the recommended overhang for a given arm length, and the needle should land within a fraction of a millimetre of the template’s lines.
Do not make arbitrary adjustments here. Alignment is a check, not a preference, and a cartridge forced off its intended position sounds veiled and dull even when tracking force is perfect. If the protractor shows a consistent offset on every position, the cartridge is mounted wrong or the headshell is not straight on the arm.
Step 7: Inspect the Electronics and Connections
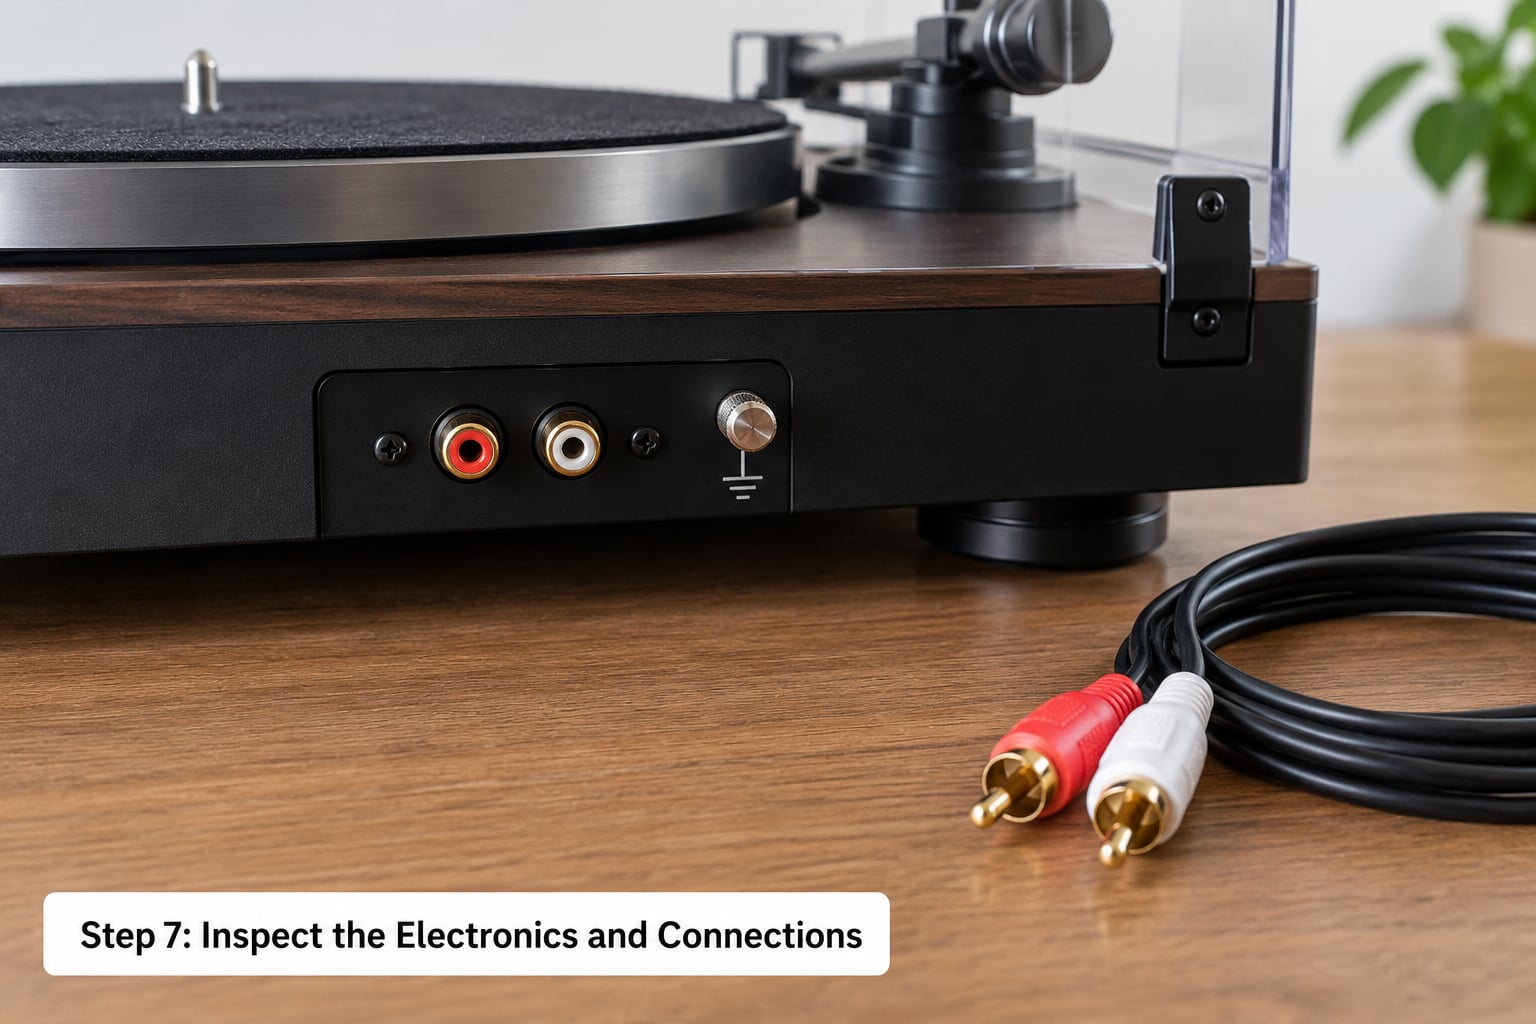
A faulty connection produces exactly the same symptom as a dull needle, and this is where a lot of muffled turntables are actually found. Work through it in order.
- Input selection. Plug into the phono input, not the line, aux or CD input. Many decks with a built-in preamp have a phono or line switch on the back; wrong, you either overload the phono stage or flatten the signal.
- Grounding. The ground post on the back must be connected to the amplifier’s ground terminal. A loose or missing earth gives a low hum rather than muffle, but it sits in the same checklist.
- Level and tone. Turn the volume up to where it belongs and flatten any tone or loudness controls on the amplifier. A treble control turned down is the cheapest imitation of a muffled stylus there is.
- AV receiver settings. On an AV receiver, use the direct or pure mode for the phono input. Surround modes, tone management and subwoofer crossover filters all sit between the deck and the speakers and can thin the sound out badly.
- Cables and sockets. Push both RCA plugs fully in and try a different input on the amplifier. An input that hums or rolls off is a dead input, and nothing you do to the turntable will fix it.
If the receiver is the suspect, the fastest test is a small external phono preamp into a line input, or headphones straight from a deck that has a built-in stage. That removes a whole chain from the equation in about two minutes.
Step 8: Test the Turntable on a Known-Good Setup
Isolate the fault by substitution. Play one clean record you know is good, on the same deck, through a different input or a pair of headphones. Then swap one variable at a time: another amplifier, another deck at a friend’s place, a different cartridge, a different set of RCA cables.
The result tells you where you stand. Headphones clean and speakers muffled means the fault is downstream in the amplifier or the speakers. The deck clean on another amplifier means the problem is in the deck. One channel noticeably quieter than the other points at the wiring, the cartridge pins or a failing stylus. If nothing you substitute changes the muffled character of the sound, the cause is mechanical or electronic inside the deck, and that is the point to stop and get a second opinion.
Common Mistakes
These are the errors that turn a fixable dull sound into a permanent one, and they are all common.
- Household cleaners on records. Windex, vinegar, glass cleaner and isopropyl alcohol strip the vinyl or dissolve the binder in older shellac pressings. Use proper record fluid or nothing.
- Setting the arm down before the platter is at speed. The stylus lands in a moving groove and gouges it. Cue only after the platter has settled.
- Guessing the tracking force by feel. Setting it by ear or by pushing down on the arm is how records and cartridges get destroyed. Use a gauge and the cartridge spec.
- Running on a damaged stylus. A bent or badly worn tip chews grooves and slowly ruins the records you play next. Stop immediately if it sounds worse than before.
- Buying a cartridge first. Most muffled turntables are fixed with a clean and a correct setting. Check the free fixes before spending on hardware.
- Skipping the electrical checks. Wrong input, flat tone controls, an unused direct mode — all of these sound identical to a bad needle.
- Cranking anti-skate. Too much anti-skate pulls the arm outward and adds a thin, scratchy edge to the top end. Match it to the tracking force and stop.
Prevention is mostly habit. Store records vertically in clean sleeves, clean them before they look dirty rather than after, keep the dust cover off while playing, and check the tracking force with a gauge every few months. A level, clean deck with a correctly loaded stylus plays records at close to their pressed quality, and it keeps doing it for years.
Frequently Asked Questions
Can a dirty stylus make a turntable sound muffled?
Yes, and it is one of the most common causes. A stylus that has picked up dust acts like a plough across the groove, dulling the treble and smearing the mids. Unplug the deck, look at the tip under 10x magnification, then brush it with a soft camel-hair brush, pulling from the front of the cantilever to the back, along the arm’s direction. Two or three strokes is enough. Never push sideways or touch the cantilever with a finger.
Will replacing the stylus fix a muffled turntable sound?
Only if the stylus is genuinely worn or damaged. A blunt, flattened or bent tip will keep a turntable sounding dull no matter how well it is set up, and it damages grooves as it goes. But if the needle is clean and intact, a new stylus will not touch the sound. Check the tracking force, the cartridge mounting, the phono input and your records first. Moving magnet cartridges usually take a fresh stylus; moving coil models usually need a whole new cartridge.
What is the correct tracking force for a turntable?
Whatever your cartridge manufacturer specifies, usually somewhere between 1.5 and 2.5 grams. Moving magnet cartridges tend to sit at the lower end of that range, moving coil cartridges often need the upper end. To set it, zero the dial, balance the tonearm so it floats level at the armrest, then dial in the specified figure and confirm with a tracking force gauge resting on the record. Set anti-skate to the same number and check again.
Is it safe to clean vinyl records with rubbing alcohol?
No. Isopropyl alcohol is used by some record cleaning solutions in careful dilution, but straight from the bottle it can attack the vinyl and it is risky on older shellac pressings, where it can dissolve the binder and permanently scar the surface. Household glass cleaner, vinegar and degreaser are worse. Use a fluid made for vinyl, applied sparingly with a lint-free cloth, or stick to a dry brush for routine cleaning and take damaged or sticky records to a professional cleaning machine.
Why does my turntable sound dull on some records but not others?
That is a useful diagnostic, not a mystery. If the deck sounds clean on freshly cleaned records and dull on dusty ones, the turntable is fine and your collection needs cleaning. If a specific record stays dull after a proper clean, look at warping, a scratch crossing the playing surface, or a worn-out side. If older pressings are dull while newer ones are clean, the cartridge may simply have lost the compliance it had at the factory, which is a cartridge question rather than a setup one.
When should I take a turntable to a repair technician?
Stop and get a technician when the muffled sound survives a full setup check, when swapping the amplifier, the cables and the input changes nothing, or when you see a bent cantilever, a cracked cartridge body, a stylus sitting loose inside its cartridge, or a platter that wobbles visibly at speed. A tonearm that will not hold its rest position points to worn pivot bearings, and no amount of cleaning or tracking force adjustment will fix that. Belt, idler and motor work is worth leaving to a specialist too.
Start tomorrow with the free work. Play three records from different years, clean them, and clean the stylus. If the sound does not change, zero the tracking force dial, balance the arm, and set the figure from your cartridge’s spec sheet with a gauge. If it still sounds muffled, check the input and the ground before you touch any hardware. Nine times out of ten the answer is a dirty record, a dirty stylus or a number on a dial, and an hour of that saves an afternoon of shopping.