You can tell in about a minute: unplug the deck, lift the platter or slip the belt out, and look at it. If the rubber is cracked, shiny, sticky, slack or frayed, or if the platter runs slow, surges or takes forever to reach speed, the belt needs replacing. Most owners can swap one in under fifteen minutes with basic tools.
This guide covers the whole diagnostic in order: how to inspect the belt, how to confirm a speed problem with a strobe disc or a speed app, and which symptoms point at something other than the belt. If your deck is direct drive, stop here. Direct-drive turntables have no belt, and everything below does not apply to them.
Worth saying up front: a belt is the cheapest part on a belt-drive turntable, and one of the highest-value repairs you can make. Owners on r/turntables regularly report an immediate drop in wow and flutter after fitting a fresh belt. The flip side is that a worn belt left in place keeps over-working the platter bearing and the motor, which is far more expensive to put right.
Table of Contents
- What You Need
- Step-by-Step
- Step 1: Identify the belt and your turntable model
- Step 2: Look for signs the belt needs replacing
- Step 3: Test the turntable’s speed and playback
- Step 4: Replace the belt once the inspection confirms it
- Step 5: Confirm the repair
- Common Mistakes
- Frequently Asked Questions
- How long does a turntable belt usually last?
- What are the most common signs that a turntable belt needs replacing?
- Can I replace a turntable belt myself?
- How do I know which turntable belt to buy?
- Should I replace a slightly stretched or shiny turntable belt?
- Why is my turntable still running at the wrong speed after replacing the belt?
- Conclusion
What You Need
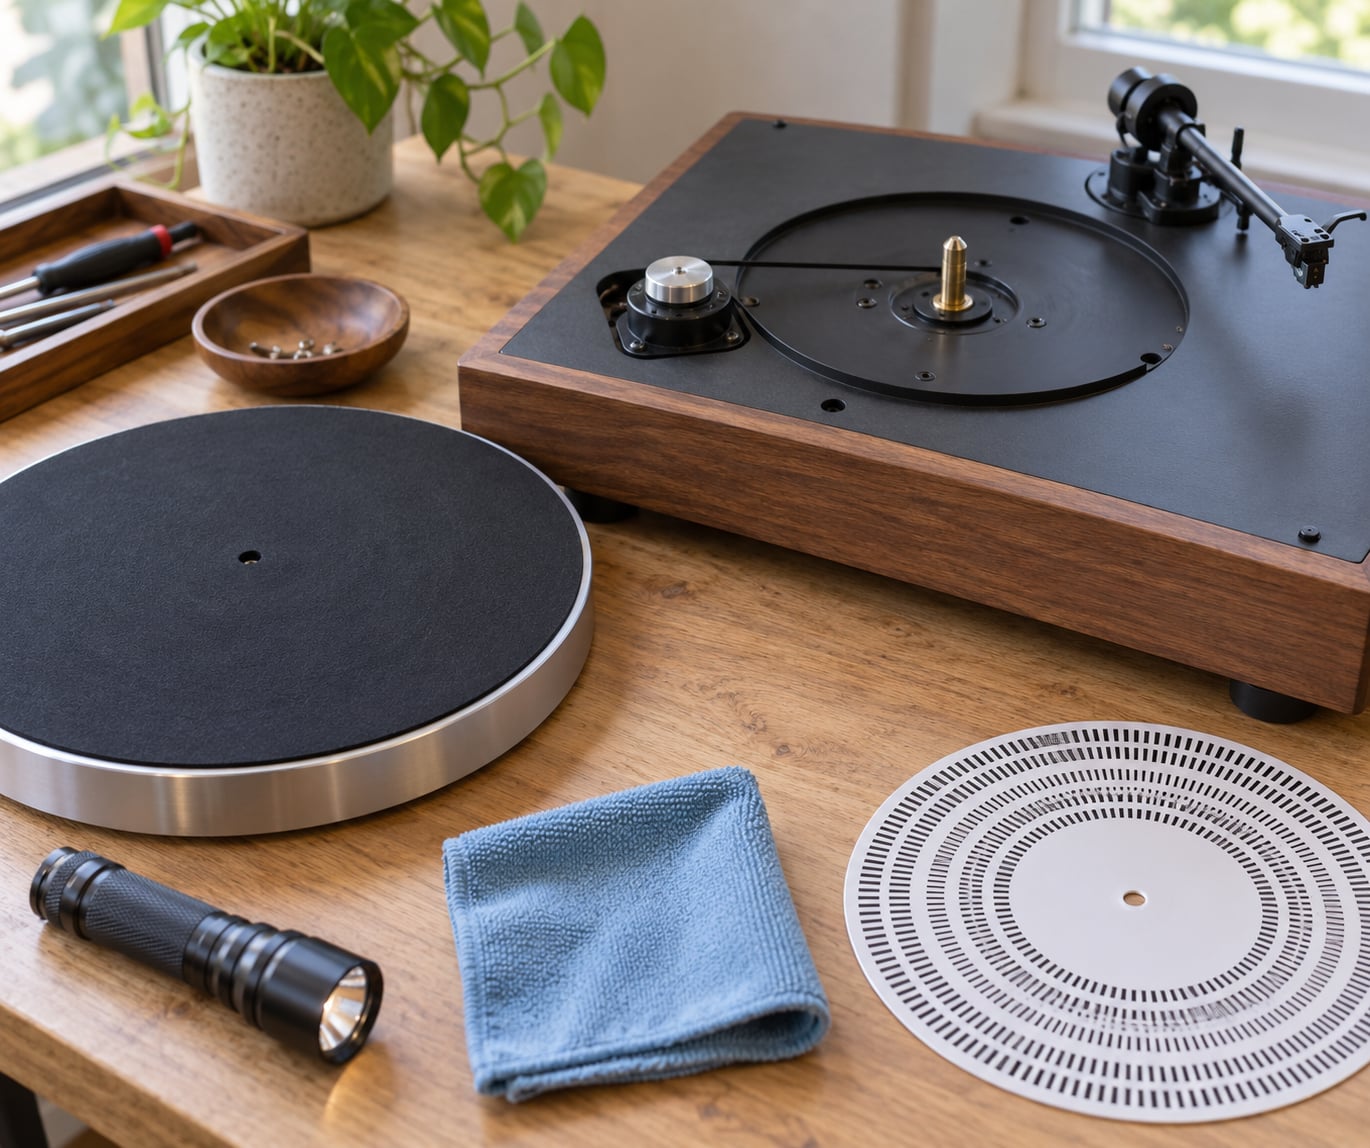
Gather these before you start. Most are household items, and the only part you might need to hunt down is the belt itself.
- The owner’s manual. It carries the belt specification and, on many models, a part number. Some manuals also state the replacement interval the manufacturer recommends.
- A flashlight or phone torch. The belt runs in a narrow channel under the platter rim, and you will not see much without direct light.
- Microfiber cloth and isopropyl alcohol. For cleaning the motor pulley and platter rim. Skip the alcohol on the belt itself if the rubber looks sticky, since solvent can attack aged rubber.
- A stroboscope disc or a turntable speed app. A printed strobe disc under a fluorescent light, or a strobe app on your phone, gives you a hard speed reading.
- Correct replacement belt. Match it by model number, not by outer diameter alone. Hold off on buying until Step 1.
- A phone camera. You will want a photo of the belt path before you disturb it.
If you plan to do more than one job on the deck while the platter is off, a dedicated turntable mat tool makes lifting it far less awkward than bare hands.
Step-by-Step
Step 1: Identify the belt and your turntable model
Find the model number on the underside of the plinth or on the original manual cover, then look up the belt specification for that exact model. Vintage Dual, Thorens, Akai, Pioneer and Technics decks all take different belts, and two decks from the same brand era can take different sections.
Record four things before you buy anything: the belt’s cross-section shape, its thickness, its length, and whether your model uses a belt guide for the speed change. That last point matters more than people expect. On models with a guide, a belt that is too stiff cannot shift onto the 45 RPM setting and a belt that is too flexible pops out of the guide entirely. That failure mode runs through the AudioKarma turntable board, where owners of older Duals learned it the expensive way.
If the manual lists a part number, use it. If it does not, measure the old belt: lay it flat, mark where it has been stretched, and measure the distance between marks. Measure the old motor pulley diameter too, since belt speed is a ratio of the two.
Success check: you can state the belt length, thickness and pulley diameter before the old belt comes off. If you cannot, do not guess at the replacement yet.
Step 2: Look for signs the belt needs replacing
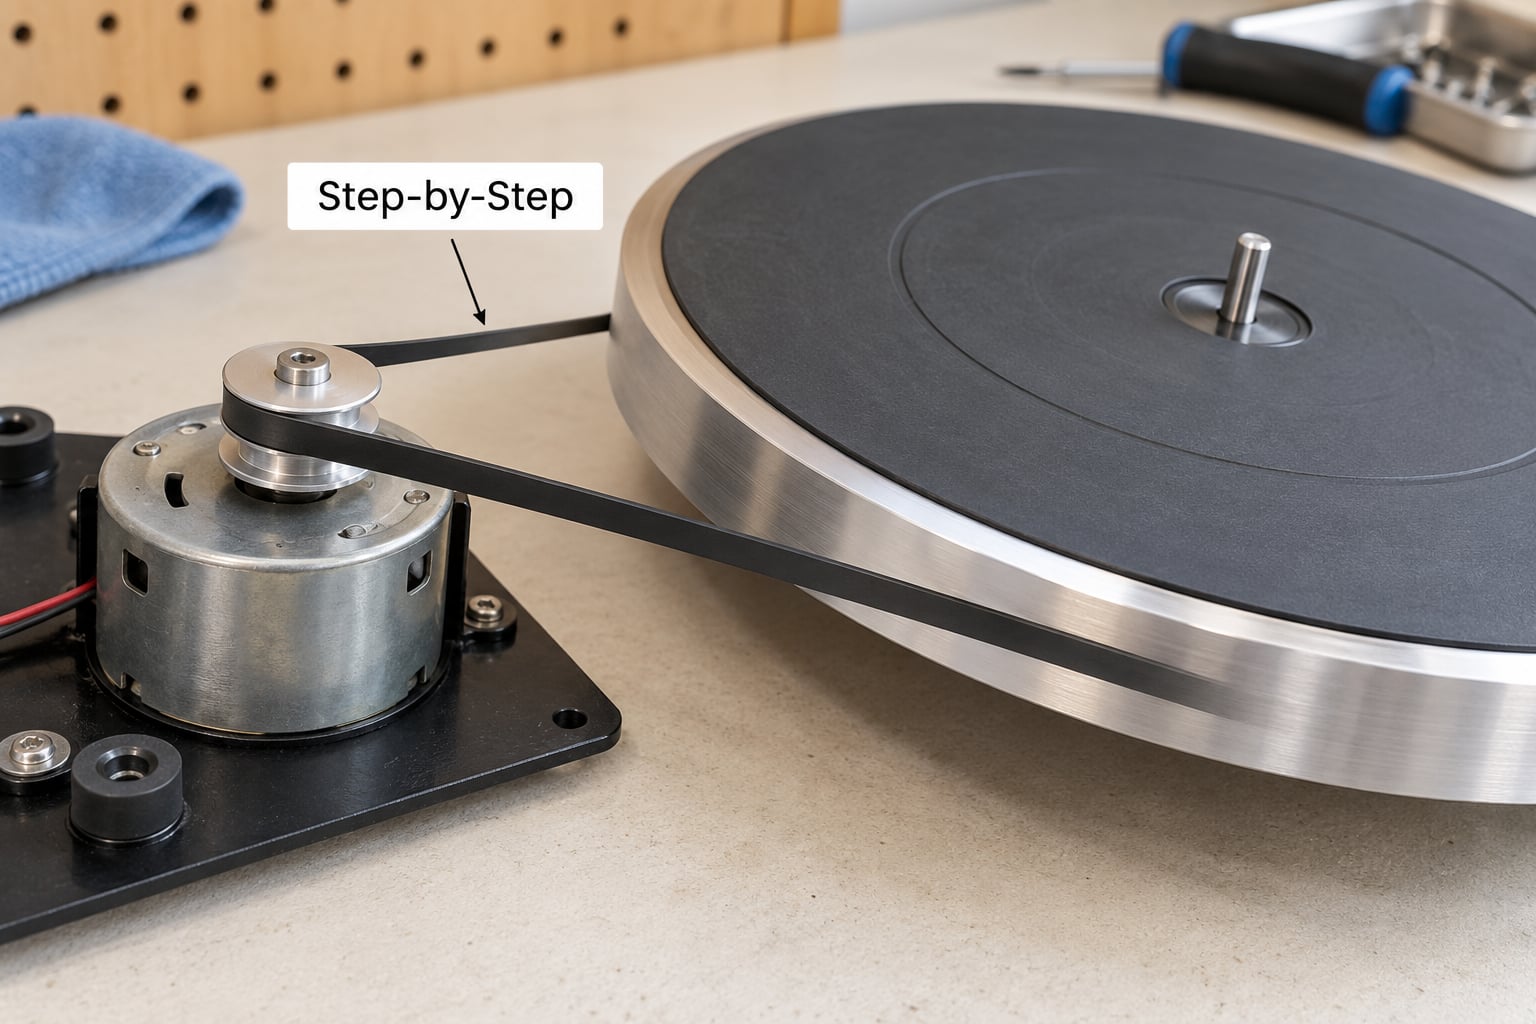
Unplug the deck and wait for the platter to stop fully. Most models lift straight off the spindle once the retaining nut is removed; some newer decks have a belt guard or a platter with a cutout, so check the manual for your specific removal procedure.
Now inspect the rubber closely. These are the condition signs that matter, in rough order of how much they should worry you:
- Cracks running across the belt. Fine surface lines are normal on an old belt. Deep fissures that go through the rubber mean it will fail soon.
- A glossy, glazed surface. This is the most common finding on a used deck. A shiny belt has hardened and lost its grip on the pulley.
- Sticky or tacky patches, or tar-like residue on your fingers. The rubber is breaking down chemically. Never clean this belt and keep using it.
- Flat spots and fraying on the edges. These come from a belt that has been sitting slack on a pulley, or rubbing a belt guide badly.
- Excess slack. Press the belt’s midpoint toward the platter rim with a fingertip. If it deflects more than a few millimetres and feels loose, it has stretched past useful.
- A belt that no longer sits flat. Old rubber takes a permanent wave. A belt that looks like a wavy noodle instead of a flat loop is done.
- Contamination. Dust, pet hair or spilled liquid on the belt or pulley means slippage and heat, and cleaning alone will not fix the underlying stretch.
Do the visual check even if the deck sounds fine. Owners on r/turntables point out that rubber crumbles with age even when the belt looks serviceable, and the platter spinning normally says nothing about the belt’s condition. One or two mild signs on a deck that plays at correct speed is usually a “watch it” situation.
Success check: you can point to at least one specific physical defect, or you can say the rubber looks clean and healthy and move on to the speed test.
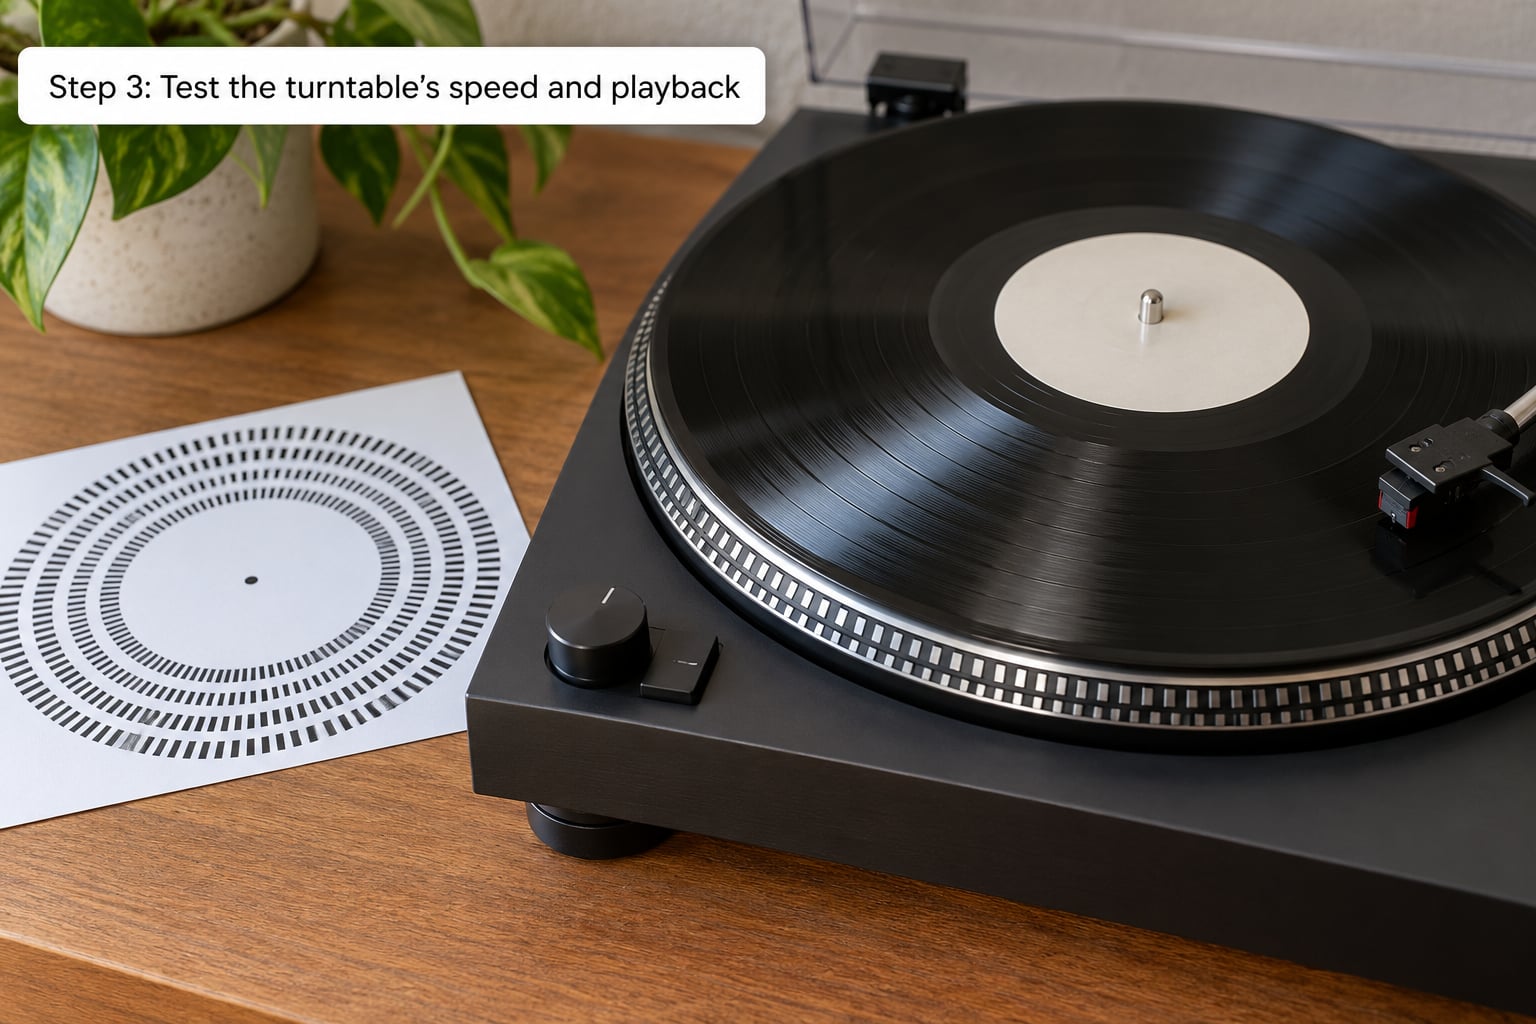
Step 3: Test the turntable’s speed and playback
This is the step that settles the argument. Put the platter back on, restore power and let the deck run for a few minutes until it is fully up to speed.
Put the strobe disc on the platter, or run a strobe app and hold your phone over the platter markings. On a correct deck at 33⅓ RPM, the strobe pattern looks stationary, drifting slightly if you set the pitch a touch high the way most manuals recommend. At 45 RPM the same disc needs to be set for 45. A pattern that crawls steadily in one direction means the platter is running slow; one that crawls the other way means fast. Drifting by more than a fraction of a turn per second is out of tolerance and worth chasing.
Listen for the rest of the symptoms:
- Running slow, or sounding dragged. The classic sign. A stretched or glazed belt slips on the pulley.
- Pitch wobble. That is wow and flutter: the platter’s speed varying slightly as it turns. A little is normal, more is not.
- A slow start. A glazed belt needs a moment to catch, so the platter takes many seconds to reach speed. As the belt weakens, the delay gets longer.
- Occasional stalls. The belt slips badly enough that the platter bogs down mid-side.
- Records skipping, or one side playing slower. Speed trouble often reaches the record before you notice it as a speed trouble.
- Popping or grinding noise from the motor area. A cracking belt or a dry motor spindle, not the motor winding itself.
- A belt that jumps off the motor pulley. Read that as a belt problem, and check for an alignment issue too.
One useful calibration if you own a brand-new belt already: new belts tend to run slightly faster than a worn one, because a worn belt thins and stretches, changing the ratio. That is normal, and it is why some owners who replace a stretched belt are briefly surprised that the pitch has shifted upward.
Success check: the strobe reading is steady within tolerance and the speed selector moves cleanly between 33 and 45. If the belt reads as bad but the speed is perfect, replace it on condition alone.
Step 4: Replace the belt once the inspection confirms it
Only fit a new belt when the inspection supports it. Here is the swap, model-agnostically:
- Unplug the deck and remove the platter, or open the belt guard on models that use one.
- Take a phone photo of the belt path before touching anything. The routing is the part people get wrong.
- Note how the belt sits on the motor pulley and whether it passes through a belt guide or under a speed-change arm.
- Lift the belt off the pulley carefully. Old rubber can crack and snap as you peel it away.
- Clean the motor pulley and the platter rim’s inner surface with a dry microfiber cloth. Remove any residue or dust.
- Fit the new belt, following your photo. Do not stretch it hard over the pulley to get it on.
- Check seating: the belt should sit flat in the groove with no twist and no buckle.
- Refit the platter, confirm it sits level and does not rub, then power up.
On the tension question, listen to the r/turntables advice that circulates there: a belt should sit on the pulley without wobbling, but it should not be tight. If it feels stretched hard once it is on, you have either fitted the wrong belt or routed it wrong. Owners warn there that a too tight belt can ruin the motor, and it also loads the platter bearing.
If your model has no OEM belt available, West Coast Belts, William Thakker and KP Components are the suppliers the vinyl community actually names when sourcing vintage parts. Older Duals, Akais and Pioneers are the models where sourcing takes weeks rather than minutes, so start early.
Step 5: Confirm the repair
Let the deck run for a few minutes, then run the strobe test again. Speed should now hold steady at both 33 and 45, and the speed selector should shift cleanly without the belt fighting the guide.
Play a record you know well. Startup should be quicker, pitch should sit steady through the side, and any skipping that was speed-related should be gone. Lift the platter halfway and visually confirm the belt still sits flat on the pulley.
Success check: steady strobe at both speeds, clean belt seating, and playback that matches what the deck sounded like new.
Common Mistakes
Most belt jobs that go wrong go wrong in one of these ways.
Buying by outer diameter alone. Belt length is not the only variable. Thickness changes the speed ratio, and cross-section shape decides whether it sits properly on the pulley. A belt that is close enough in length can still run at the wrong speed or fall off.
Installing the belt twisted. Half the complaints of “my new belt runs wrong” come down to a half-twist. The belt should lie flat in the groove all the way around.
Routing it through the wrong path. On decks with a belt guide or a speed-change arm, a belt routed outside the guide will not shift to 45. Check your photo from Step 4 against the manual diagram.
Over-tightening the motor assembly. Some owners recommend adjusting the motor tension to compensate for a stretched belt. That loads the motor and the platter bearing for no real gain. Fix the belt instead.
Cleaning too aggressively. Alcohol and solvents do not belong on aged rubber. Clean the pulley and the platter rim, not the belt.
Reaching for WD-40 or belt dressing. It makes a glazed belt feel better for a week and turns the pulley into a tar trap. It is a temporary trick, not a repair.
Stretching the belt over the pulley to get it on. A new belt goes on with light hand pressure. Forcing it pre-stretches it before it has ever run.
Replacing a belt when the fault is elsewhere. If the speed was never right, or the deck has always run fast, suspect the motor, the pitch control or the pulley first.
And here is the useful triage, since the misdiagnosis is what actually wastes people’s money:
- Runs slow, pitch drags, slow start: belt almost always. Start here.
- Pitch wobble that gets worse as the side plays: belt or the motor spindle. Check the belt first, then clean the spindle.
- Skipping on one record only: that record, not the deck. Clean it and check the flatness of the vinyl.
- Skipping on every record, with the speed right: stylus wear, tracking force, or a record sitting badly on the mat.
- Consistently fast speed: wrong belt thickness, wrong pulley diameter, or pitch control misadjusted. Rarely a stretched belt.
- Sound thin or distorted, speed fine: stylus or cartridge, not the drive.
- Noise from the motor, speed fine: dry motor spindle, cracked belt, or dust on the pulley.
- Stall that a power cycle fixes: a glazed belt is the first suspect, then a tired motor.
For long-term storage, owners suggest relaxing or removing the belt from the motor pulley so the rubber does not take a permanent set under tension. Dust off the pulley before it goes back into the case, especially in humid conditions.
Frequently Asked Questions
How long does a turntable belt usually last?
On a daily-play deck, most belts give out somewhere between three and seven years. On a casual weekend deck, ten years is normal, especially if the deck lives in a cool, dry room. Manuals from several brands recommend replacing every two years as a precaution, which most experienced owners ignore. Judge the belt on condition and on how the deck plays rather than on the calendar. Heat, humidity and how long it sits under tension all shorten its life.
What are the most common signs that a turntable belt needs replacing?
The most common sign is the platter running slow or sounding dragged, often with a long startup time. Others are pitch wobble, a glazed shiny surface, visible cracks, sticky or tar-like rubber, excess slack, and a belt that slips off the motor pulley. If two or more of these show up together, replace the belt. One mild sign on a deck that otherwise plays at the correct speed is a reason to keep watching, not to panic.
Can I replace a turntable belt myself?
Yes, on most models. You need a flashlight, a cloth, and the correct belt. Unplug the deck, lift the platter or open the guard, photograph the belt path, clean the motor pulley, then fit the new belt flat with no twist. Refit the platter and check speed with a strobe disc. Most swaps take ten to fifteen minutes. Vintage decks with belt guides are the fiddliest, because a belt that is too stiff or too flexible will not seat properly.
How do I know which turntable belt to buy?
Use the model number and the specification in the owner’s manual, including any part number. If the manual gives nothing, measure the old belt’s stretched length between natural stretch marks, and measure the motor pulley diameter. Belt length alone is not enough, because thickness changes the speed ratio and cross-section shape decides how it sits on the pulley. If your model uses a belt guide for the speed change, match that specification carefully.
Should I replace a slightly stretched or shiny turntable belt?
A shiny belt with no other symptoms is a watch-it item, not an emergency, though you should replace it before it turns sticky or starts cracking through. Stretch matters more than shine: if pressing the middle of the belt moves it more than a few millimetres toward the rim, it has stretched past useful. And if the deck is already running slow or struggling to start, replace it now. Belts are cheap and a fresh one costs far less than a bearing or motor job.
Why is my turntable still running at the wrong speed after replacing the belt?
Usually the belt is the wrong thickness for that model, which changes the ratio against the motor pulley. A worn belt stretches and thins, so the deck may have been running slightly off before you touched it, and a new correct-gauge belt can read fast by comparison. Other causes include a belt fitted twisted or routed outside the belt guide, a pitch control that needs resetting, a wrong pulley diameter, or a motor that has lost strength.
Conclusion
Start with the belt, not the motor. Lift the platter, look at the rubber, and check speed with a strobe disc. If the condition signs and the playback symptoms line up, or if either one alone is bad enough to hear, replace it, matching the belt by model number and thickness rather than length alone.
If the speed reading is steady and the belt looks healthy, look elsewhere before you spend anything. Answering how to tell if your turntable belt needs replacing comes down to condition first, symptoms second, and a spec check before you buy. That order saves you fitting a perfectly good new part to a problem it cannot fix.