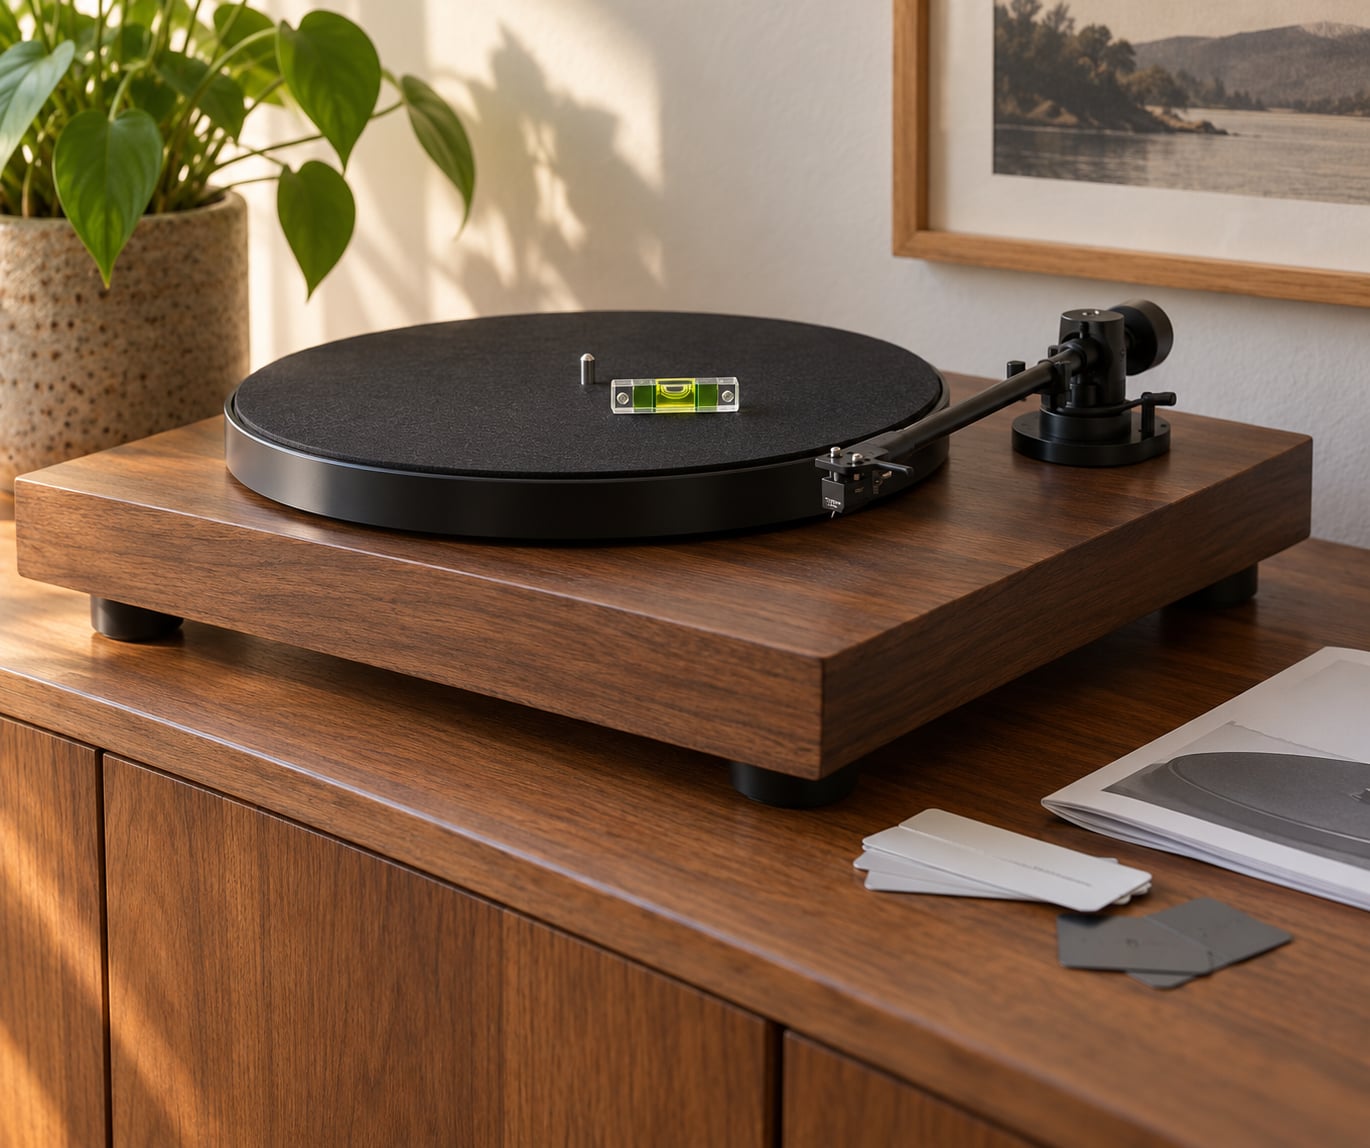
To level a turntable, place a bubble level on the platter near the spindle, check it front-to-back, rotate the level 90 degrees and check again, then raise or lower each of the four feet until the bubble sits dead centre on both axes. It takes about fifteen minutes on a deck with adjustable feet, and the fiddly part is not the tool, it is the surface underneath.
The reason to bother is mechanical rather than cosmetic. A tilted platter changes the tracking angle the stylus sees at the outer edge of a record, and it loads the spindle bearing unevenly, which is a slow way to wear out a bearing. It also skews the geometry that your anti-skate and counterweight settings were calibrated against, so a deck that was set up correctly can stop tracking properly the moment it is nudged onto a crooked shelf.
Most manuals deal with this in one sentence, and the forums are full of half-solutions. Here is the full procedure, including what to do when the feet do not adjust and how to tell whether your level is lying to you.
Table of Contents
- What You Need to Level a Turntable
- Step-by-Step: How to Level a Turntable
- 1. Place the Turntable on a Stable Surface Before Leveling
- 2. Check the Platter and Base for True Level
- 3. Adjust the Turntable Feet One Corner at a Time
- 4. Verify the Tonearm Height and Cartridge Alignment
- 5. Test Speed, Tracking and Repeatability
- Common Mistakes When Leveling a Turntable
- Frequently Asked Questions
- Does a turntable have to be perfectly level?
- Is a bubble level necessary to level a turntable?
- Which leveling tool is most accurate for a turntable platter?
- How do I level a turntable with no adjustable feet?
- Is leveling the same as calibrating tracking force and anti-skate?
- My turntable still wobbles after leveling. What should I check?
What You Need to Level a Turntable
Gather these before you touch a foot. It saves the annoyance of getting the bubble centred and then discovering the tool was the problem.
- The manufacturer’s manual. Foot thread direction, isolation design and any built-in level behaviour differ by model, and the manual states the intended method.
- A good spirit level. A bullseye level or a spindle level gives more consistent readings than the small circular vial that ships in the plastic bag with many budget decks.
- A flat, stable surface. A solid cabinet or a dedicated stand, not a hollow shelving unit that flexes when you lean on it.
- A cloth and something to mark with. For wiping the platter rim clean and noting which corner is high.
- Shim material, if the feet are fixed. Thin playing cards, paper card, or purpose-made machined aluminium shims. Avoid coins on aesthetic grounds if you care, and on mechanical grounds if they are thick.
- A record and a stylus setup tool. You want to test with vinyl on, not just an empty platter.
Before anything else, check whether the deck has a built-in level. Several models do, usually a circular vial in the plinth or a bubble window near the platter rim. It is convenient, but it sits on the plinth while the platter is the surface you actually care about, so treat it as a starting point and verify with your own level.
Step-by-Step: How to Level a Turntable
1. Place the Turntable on a Stable Surface Before Leveling
Put the deck on something heavy and flat. A filled cabinet works well; a hollow media shelf often has a slight bow that no amount of foot adjustment will fully hide.
Remove the dust cover and take the record and any mat off the platter. Then position the turntable squarely, with the front edge parallel to the front of the cabinet and roughly 30 cm from the wall so air can move behind it. Give it a gentle push from each side; if the plinth rocks, the surface is not flat enough and no amount of leveling will fix it.
Do not lift the deck by its feet or by the dust cover. Carry it by the plinth with two hands, and set it down before you start turning anything.
2. Check the Platter and Base for True Level
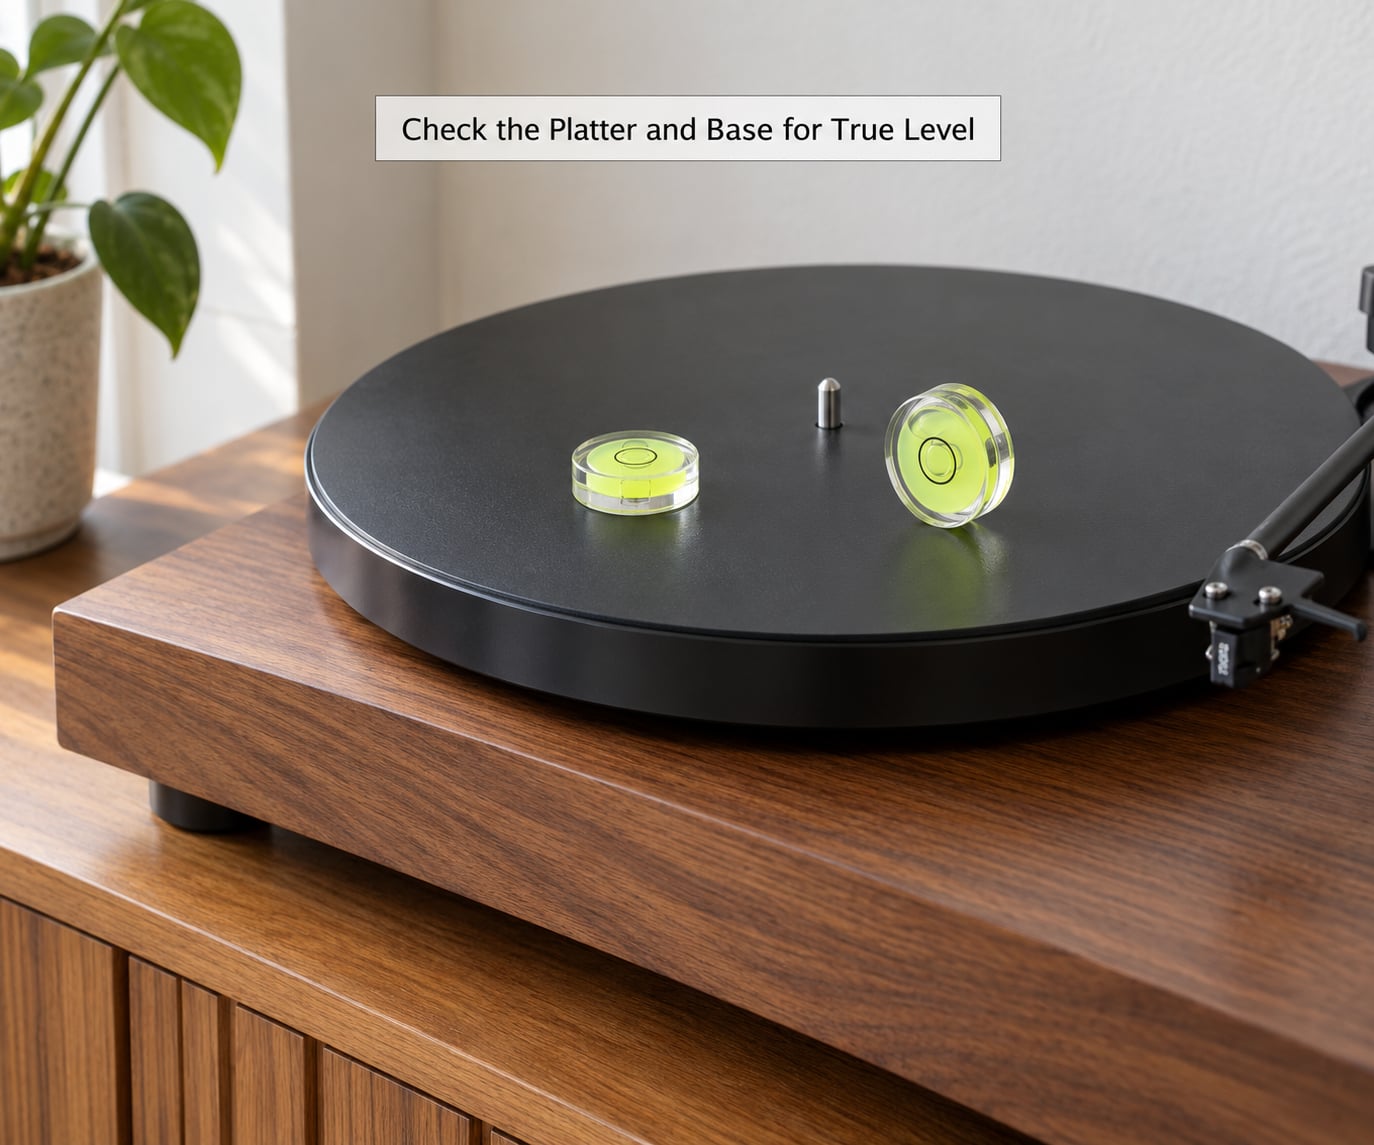
Place the level on the platter near the spindle, clear of the record area, and read it front-to-back. Then rotate it 90 degrees and read it side-to-side. Both readings have to be centred, and a deck can be perfectly fine on one axis while being visibly out on the other.
Move the level to three or four positions around the platter and read each one. A bubble that stays centred everywhere means the plinth is genuinely flat. A bubble that reads differently at each spot points at one of two things: a warped or twisted plinth, or a poor quality level. Check the level on a surface you trust, such as a known-flat worktop, before you blame the deck.
This is the step that catches most people. Owners of budget decks report the supplied circular level giving different readings at the same spot depending on how far it is rotated, and that is a fault in the level, not a signal about the turntable. A bullseye level or spindle level solves it because it can be centred in any rotation.
On tolerance, a commonly repeated figure from vintage hi-fi lore is that a bubble sitting inside its target circle while the platter spins means you are within about one degree. That sounds strict until you put it in context. Across a 300 mm platter, one degree of tilt is roughly 5 mm of height difference corner to corner, and that is well inside what the tonearm and stylus can compensate for. Centred bubble, all four feet in firm contact, no rocking: that is level enough.
3. Adjust the Turntable Feet One Corner at a Time
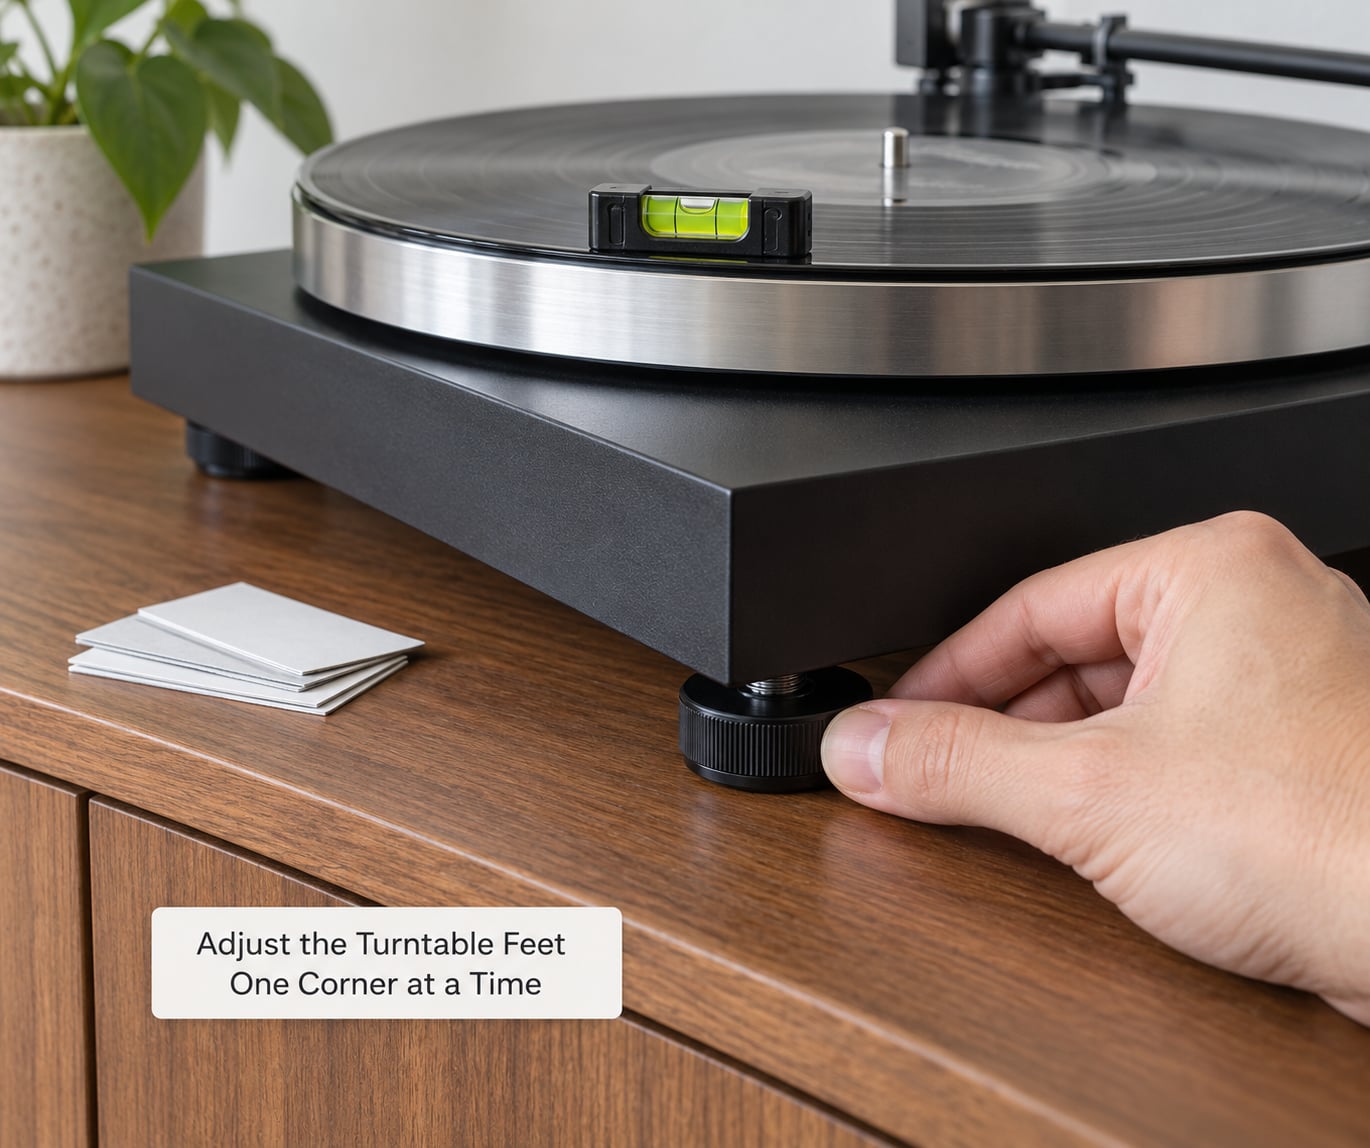
Work one corner at a time and make small turns. On most decks the feet unscrew to raise the plinth, so turning the foot itself is the adjustment; a few designs require you to loosen a lock nut first.
Start by placing a finger under the plinth edge at the high corner and gently pushing up until the bubble moves toward centre. Note how far it moved. That measurement tells you how much to turn the foot, and it takes about 15 degrees of foot rotation on a typical deck.
After each adjustment, re-read the level on both axes. Feet influence one another, so a turn at one corner can push the bubble back off at another. Expect two or three passes around all four corners before it settles.
Do not crank the feet to their limit. Many turntables use sprung or elastomer feet designed to compress slightly, and that compliance is part of the vibration isolation. Tightening them hard removes it and can make a deck sound worse than the one you started with. Stop when you have the bubble centred and every foot is in firm contact with the surface. Then push gently on each corner in turn and confirm nothing rocks.
Some models, particularly Technics decks, have feet that feel stiff and slightly broken through the first part of their thread travel. Turn them with steady pressure and they will come free. If a foot will not move at all, stop and check the manual rather than forcing it.
4. Verify the Tonearm Height and Cartridge Alignment
Leveling the plinth does not set up the tonearm, and the order matters. Set the turntable level first, then balance the arm, set tracking force, then set anti-skate. Calibrating anti-skate on an unlevel deck means correcting it twice.
With the level confirmed, put the arm rest down and check the cartridge visually from above. The cartridge body should sit parallel to the record surface and the cantilever should point at the correct angle for the arm length. Manufacturers specify this in the manual; a moving-magnet cartridge on a short arm wants more overhang than one on a long arm.
Check arm height and clearance too. With the arm locked, there should be visible gap between the cartridge and the record surface, and no contact between the arm rest or its clip and the platter. On a deck with a dropping front, the front panel drops into the plinth, so that clearance is narrower by design. Anything touching means the plinth is sitting too high or the arm rest is not fully engaged.
5. Test Speed, Tracking and Repeatability
Put a record on and drop the needle about halfway out. What you are listening for is even volume from the centre groove to the run-out, no skipping at the outer tracks, and no change in speed that repeats once per revolution, which usually means the platter or subplatter is not seated properly.
Then power the deck off, leave it for a minute, and switch it back on. Check the level again. Feet can settle into the surface over the first few cycles of warming and cooling, and a deck that looked centred at room temperature can drift a fraction overnight. Most drift is small enough that it does not matter, which is a useful thing to learn directly rather than guessing.
For repeatability across the whole surface, move the level to a new spot and read it again. If the bubble has wandered more than the width of the target line, something moved and you should find it before listening to records.
Common Mistakes When Leveling a Turntable
Checking only one axis. A deck can be dead level front-to-back and visibly out side-to-side. Rotate the level 90 degrees every time.
Adjusting the tonearm to fix a level problem. If the bubble is out, change the plinth. Anti-skate and tracking force are set afterwards, not instead.
Over-tightening the feet. Many feet are meant to be slightly compressed. Wrenching them down flattens the isolation and can transmit more vibration, not less.
Shimming a single foot without re-checking contact. Raise one corner and you can push another foot out of contact with the cabinet. That is how wobble starts. Shim, then check that all four feet still carry weight, and re-read the level on both axes.
Putting the deck on the same shelf as the speakers. Leveling cannot fix acoustic pressure. A speaker cone three feet away makes any measurement on the plinth meaningless, and the feedback loop gets worse as volume rises.
Treating a flat surface as a good one. Level answers one question. It does not answer whether the cabinet is heavy, whether it is coupled to the wall, or whether footsteps shake the floor. Those are separate problems with separate fixes.
One more worth naming: leveling cannot cure a warped record. If a single disc wobbles on a deck that plays everything else cleanly, the problem is the disc, and checking the platter height will only cost you an evening.
Frequently Asked Questions
Does a turntable have to be perfectly level?
No. You want the bubble centred in its target on both axes and all four feet in firm contact, not a mathematical zero. The oft-quoted tolerance is about one degree of platter tilt, which works out to roughly 5 mm of height difference across a 300 mm platter. Your tonearm and stylus tolerate far more than that in normal use. What an unlevel plinth actually causes is uneven loading on the spindle bearing and a tracking angle that changes across the record surface.
Is a bubble level necessary to level a turntable?
Not strictly, but it makes the job far quicker and removes guesswork. A phone inclinometer app gives you a rough slope reading and is useful for checking whether a whole cabinet is level before you start. A plain water level on the platter rim works as a rough surface check. Neither replaces a proper spirit level, because you are chasing fractions of a degree across a 300 mm platter, not two or three degrees across a shelf.
Which leveling tool is most accurate for a turntable platter?
A bullseye level or a spindle level. Both can be centred in any rotation, so they give the same reading at every point on the platter and reveal a warped plinth instead of hiding it. The small circular vial that ships with many budget turntables is the least reliable option, because its bubble shifts as you rotate the vial and it gives inconsistent results on a perfectly good deck. Spending a little on a proper level is the cheapest fix available.
How do I level a turntable with no adjustable feet?
Shim the feet. Lift the corner that is sitting low and slide thin, firm material under it, then re-check that all four feet still make contact. Thin playing cards, stiff card and purpose-made machined aluminium shims all work. Where you put the shim matters: removing the foot and fitting the shim between the foot and the plinth is far less visible than stacking it under the foot. Never shim one corner and stop, because lifting one foot can unload another and cause wobble.
Is leveling the same as calibrating tracking force and anti-skate?
No, and the order matters. Level the plinth first, then balance the tonearm, then set tracking force with a calibrated gauge, and set anti-skate last. Anti-skate works by applying a sideways force whose strength depends on the arm’s angle relative to the record surface, so on a tilted deck it compensates for the wrong geometry. Setting it on an unleveled plinth means the correction drifts as you move the arm inward.
My turntable still wobbles after leveling. What should I check?
Confirm all four feet are in firm contact, because raising one corner to fix a tilt often lifts another clear of the cabinet. Then check the subplatter is seated properly and that no shim has crept out from under a foot. If the wobble is only on one record, that record is warped. If the whole deck moves when you walk past, that is floor and wall vibration, and levelness will not touch it: a denser platform or a different position in the room will do more than any amount of adjustment.
Start with the surface. Put a bullseye level on the shelf first, and if the shelf is out, fix that before the turntable ever touches it. Once the deck itself reads centred on both axes and sits firm on all four feet, move on to balancing the tonearm and leave the plinth alone.