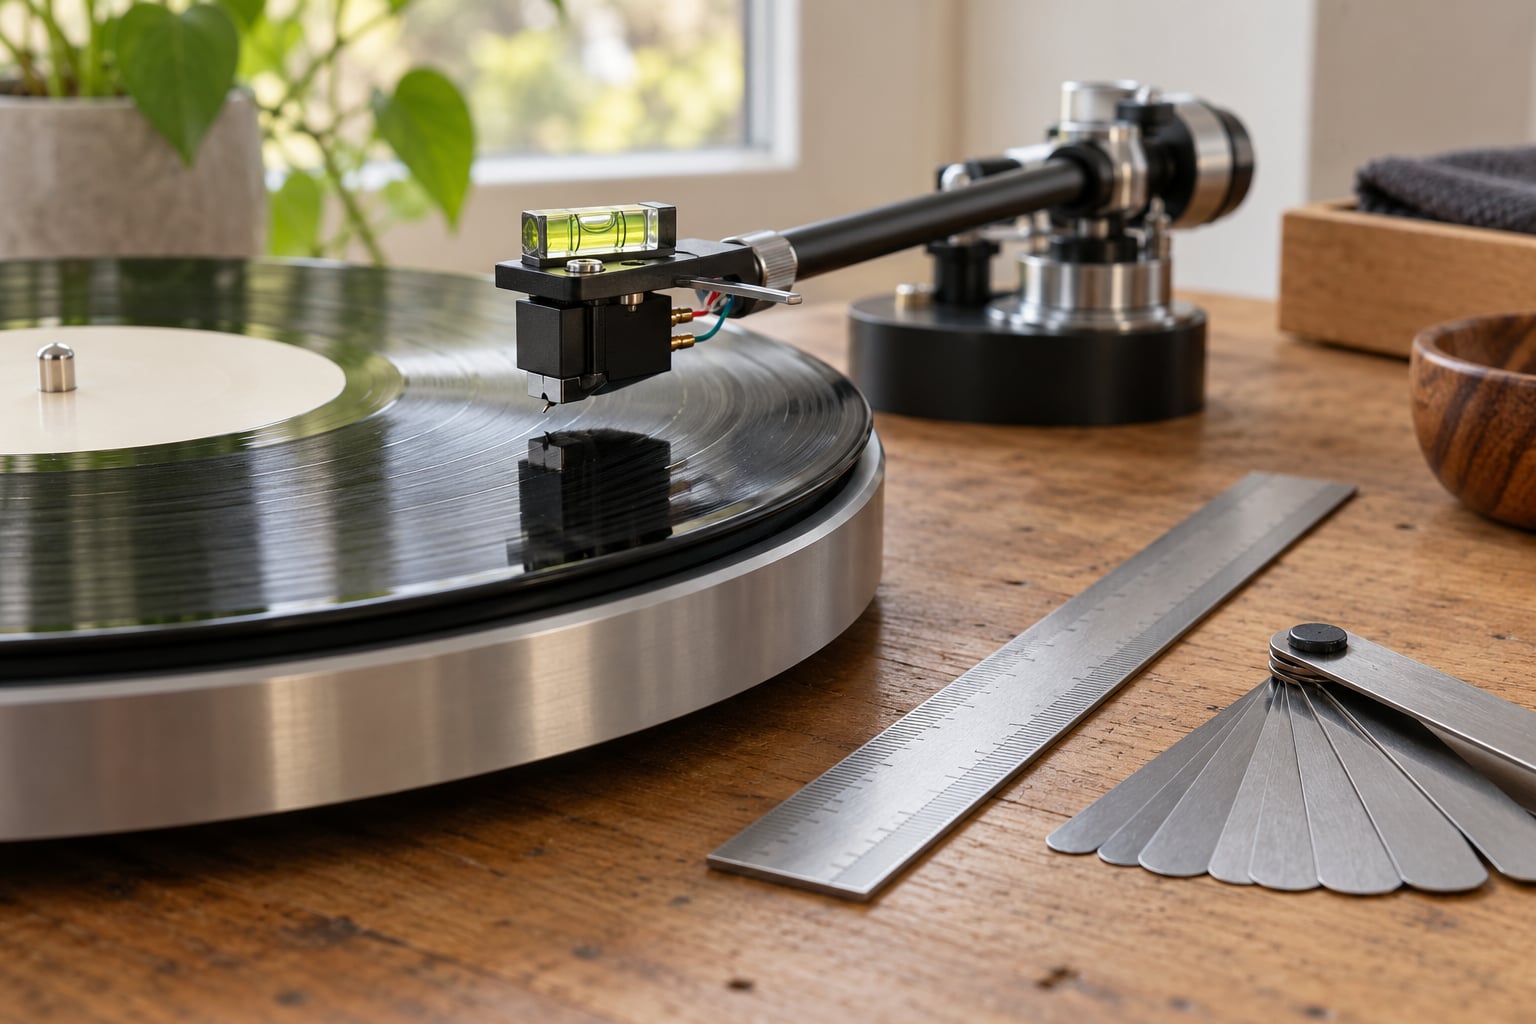
How to set VTA on a tonearm is mostly a matter of patience: level the deck, set tracking force first, then move the cartridge up or down in tiny steps until the stylus sits where the cutting head left the groove. The whole job takes about twenty minutes once you know which screw turns which way, and beginners get a cleaner result by ear than by chasing numbers on a calculator.
Vertical tracking angle is the angle between the tonearm’s cantilever and the record surface, measured from the side. Most of the time you want the top of the cartridge sitting roughly parallel to the record while the stylus sits in the groove.
Below is the sequence I use, in the order that keeps you from undoing work. Skip to the step-by-step section if you already have your tools out.
Table of Contents
- What You Need
- Step-by-Step: How to Set VTA on a Tonearm
- 1. Prepare the Turntable and Cartridge
- 2. Find the Correct VTA Reference
- 3. How to Set VTA on a Tonearm in Small Steps
- 4. Check Playback and Repeat the Measurement
- 5. Confirm the Final Tonearm Setup
- Common Mistakes
- Frequently Asked Questions
- What is the correct VTA for a tonearm?
- Does changing VTA affect tracking force?
- How do I set VTA without a tonearm protractor?
- Should VTA be set before or after cartridge alignment?
- Why does my cartridge body not match the cantilever angle?
- Conclusion
What You Need
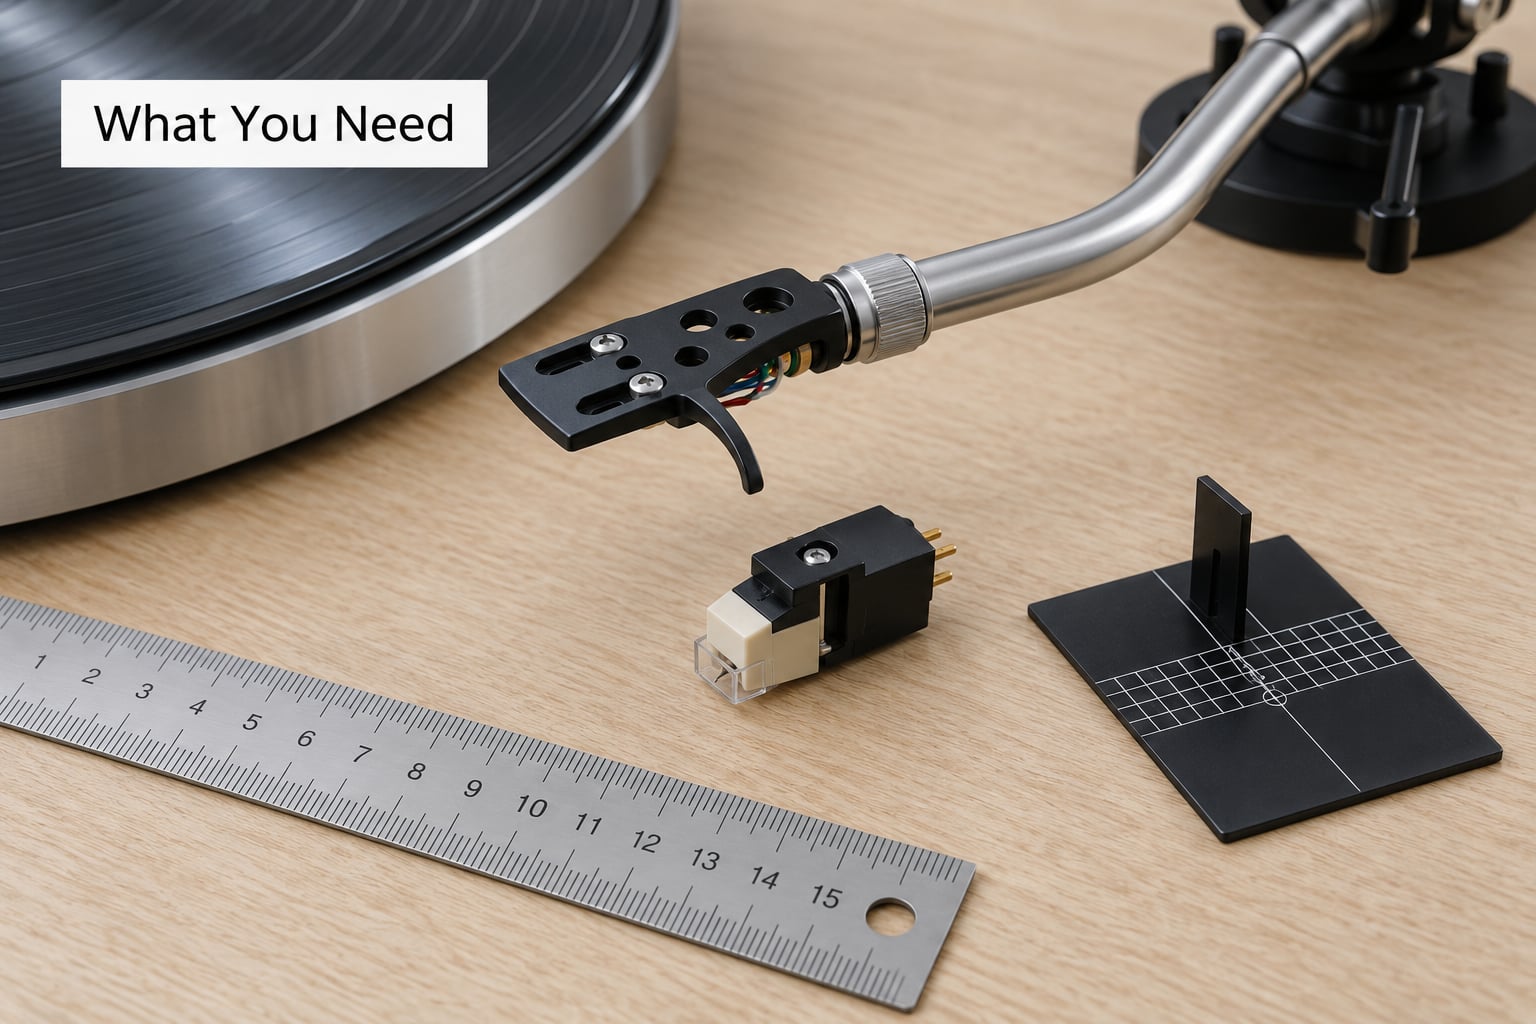
The essentials are fewer than most guides suggest. Everything beyond the first four items is a refinement, not a requirement.
- The turntable itself, on a level surface, with the dust cover off and the platter free to spin.
- The cartridge and headshell, mounted finger-tight, with the two alignment screws accessible.
- A tracking-force dial or digital scale if your arm uses one. A spring-scale gauge works too.
- A small ruler or a machinist’s square for setting the initial height, plus a bubble level for the deck.
- Feeler gauges if you want a repeatable, documentable number. This is the single biggest upgrade for repeatable setups.
- An alignment protractor, only once you have a working baseline. A digital model that clamps to the arm tube beats a printed card.
- A jeweler’s loupe or USB microscope, for looking at the stylus and cantilever when you want to check SRA rather than VTA.
Two things I keep nearby: a playing card to shim under the front of the arm base when the mechanism is coarse, and a pen. Write down what you measure. The second time you set a VTA, you will not want to guess.
Step-by-Step: How to Set VTA on a Tonearm
1. Prepare the Turntable and Cartridge
Set tracking force before anything else. VTA adjustments shift the effective length of the arm, which shifts downforce, and if you tune the angle first you will spend your evening chasing a moving target.
Zero the arm’s gauge, set the counterweight, and dial in the tracking force your cartridge maker specifies. Moving magnet cartridges usually land somewhere around 1.5 to 2 grams, moving coil cartridges often sit lower, and the number printed on the cartridge body is the one to follow. If you have no specification, start in the middle of the arm manufacturer’s stated range and adjust by listening.
Then level the deck with a bubble level, front to back and side to side. A deck that rocks by a degree will make your VTA reading change depending on where the arm sits on the record.
Check the cartridge mounting screws are snug. Loose screws let the body twist independently of the cantilever, which is one of the most common causes of a puzzling reading.
Finally, set the arm height to its factory position before you touch the VTA screws. Many arms have a height adjustment at the pivot; put it where the manual says and leave it there while you get your baseline.
2. Find the Correct VTA Reference
Your target is a range, not a single number. Moving magnet cartridges are usually designed around 23 to 25 degrees of VTA, moving coil cartridges often want 20 to 22, and the historic high-compliance designs such as the Shure V15 were cut for much lower angles, around 15.
The simplest starting point is the one most experienced listeners use: bring the top of the headshell or the top of the cartridge parallel to the record surface, with the arm at rest at the outer edge. Put a small spirit level on the cartridge body, or lay the machinist’s square across the top of the headshell, and nudge until it reads level.
Check that at two points along the arm tube, not just one. If the arm tube is parallel but the headshell face is not, the cartridge is sitting crooked and the number you read off the body is a lie.
Two measurement methods are worth knowing. The feeler gauge method slides a stack of gauge leaves between the headshell and the record to find the gap, and it is repeatable to a few thousandths of an inch. The protractor method clamps a mirror or digital angle finder to the arm tube and reads the VTA directly, which is faster once you have one.
Collectors who like measuring SRA instead use a loupe or microscope against a printed template, and they aim near 92 degrees for line-contact and hyperelliptical styli. That 92-degree figure exists because the stylus drags forward slightly as it plays, so the true rake in motion sits a couple of degrees shallower than the static picture suggests. VTA and SRA measure different things from different reference points, and mixing them up is the single most common source of confused advice online.
3. How to Set VTA on a Tonearm in Small Steps
Raising the front of the headshell increases VTA, so the stylus leans back under the cantilever. Lowering it decreases VTA, so the stylus leans forward. That is the whole mental model.
Loosen the lower of the two alignment screws by a quarter turn, move the cartridge a fraction, and tighten it back before you check anything. A common beginner error is loosening both screws and letting the headshell pivot freely in your hand, which never returns to the same place.
Work in increments that you can actually feel. If your arm has fine on-the-fly adjustment, a click or two of the knob is plenty. If you are on shims, a playing card is about 0.01 inch, so one card under the rear of the arm base is a meaningful step, and two cards is about as coarse as anyone should go while listening.
Keep the headshell square. Turn it in the horizontal plane while you work and you will change overhang and azimuth at the same time, then you will be chasing two problems with one measurement.
Each time you adjust, recheck tracking force. The weight of the cartridge sits on a lever, and moving it changes the arm’s effective length, so a change big enough to matter can shift downforce by a few tenths of a gram. Correct the dial, then move on.
4. Check Playback and Repeat the Measurement
Drop the stylus at the outer edge of a record, where tracking is hardest and misalignment shows up first. A wrong VTA is far more audible at 6 o’clock on a side than it is at the run-out groove, so start there.
Listen for focus. Too high and the top end hardens, cymbals get brittle, and the sense of space collapses. Too low and the midrange thickens, bass goes boomy, and vocals sit behind the music. Forum regulars describe the same thing in slightly different words: hard and metallic at one extreme, lifeless and dull at the other.
Play three or four tracks, not one. A single loud passage can fool you. Something with a piano or a well-recorded drum kit, something with sustained strings, and one track you know well will tell you more in five minutes than an hour of switching between settings.
Recheck the measurement after you have settled on a listening position. Hearing improves a setting, and the physical reading often confirms it lands inside the cartridge maker’s range. If the two disagree, trust the maker’s range and keep listening.
If your system and your ears permit it, an A/B recording makes the comparison honest. Record a passage at one setting, change VTA, record the same passage again, and switch between the files. Your memory for tone is worse than you think, and the files do not have a bad day.
A test record with a frequency sweep adds an objective check. Sweeps and warble tracks make tracking error and distortion audible, so a sweep that stays clean at one setting and buzzes or warbles at another gives you something measurable to go on.
5. Confirm the Final Tonearm Setup
Treat VTA as one setting in a group. With the angle where you want it, confirm the rest before you call it done.
- Tracking force matches the cartridge spec, measured with the arm at the outer record edge and the gauge reading zeroed in that position.
- Anti-skate is set to roughly the same figure as the tracking force at the outer edge, then reduced slightly if you hear skating in the inner grooves. Anti-skate counteracts the inward pull of the stylus; it does not set VTA.
- Cueing height lifts the arm far enough to clear the record but not so far that the arm drops onto the surface. Most arms have a cue-height screw or nut near the pivot.
- Overhang and azimuth stay untouched. Neither changes when you move VTA, and both are worth a separate session.
Play a full side start to finish. If the arm tracks cleanly from the outer edge through the run-out without skating or digging in, the setup holds together.
Common Mistakes
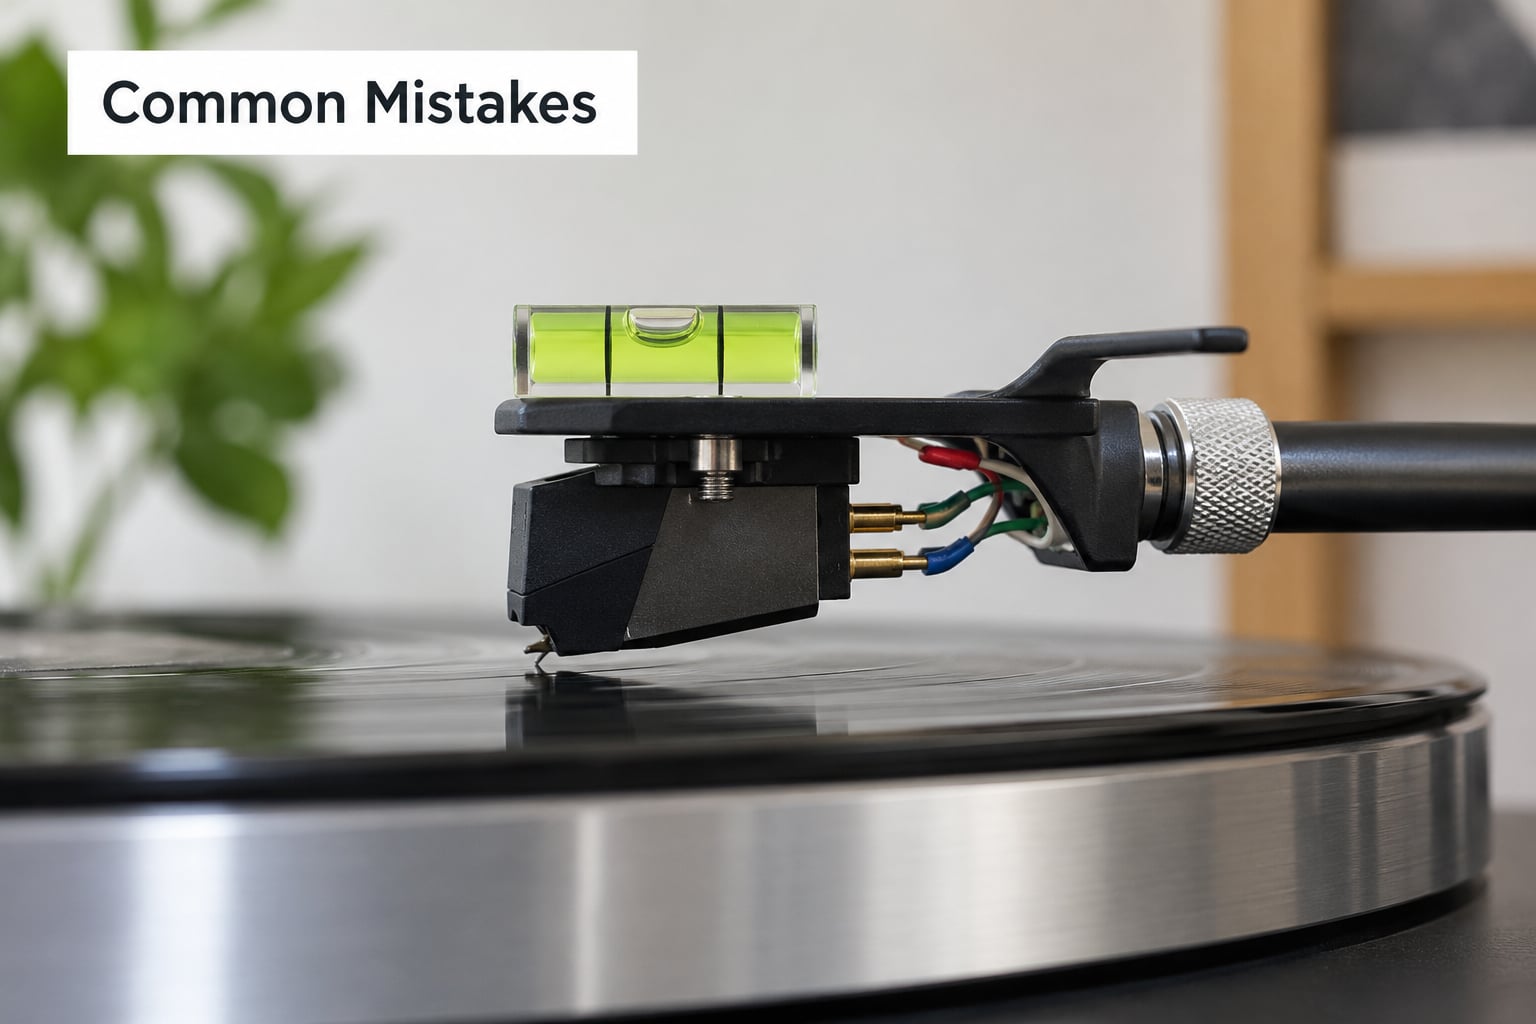
Most bad setups come down to one of these. Each has a quick fix.
Using the wrong pivot point. VTA is measured from the tonearm’s pivot to the stylus, not from the headshell face to the record. A headshell can look level while the arm is off by several degrees. Measure along the arm tube, or use a protractor that references the pivot.
Confusing VTA with cartridge alignment. VTA sets the vertical angle. Cartridge alignment sets azimuth, which is the sideways rotation of the body. Alignment templates are sensitive to VTA, so a badly set VTA makes a correctly aligned cartridge read as mistuned.
Turning the headshell sideways. Rotating the body to make it look parallel changes overhang. If your cartridge is installed at a slight angle by design, that angle is intentional.
Making oversized changes. Shimming a full card under the arm base and then listening to a full album tells you almost nothing. Move a small amount, play a known track, move again.
Ignoring the tracking-force shift. Downforce is set before VTA and rechecked after it. Every serious setup guide agrees on this.
Adjusting VTA on a fixed arm. Popular arms with no VTA adjustment are not a dead end. Rega-style arms in particular were designed around a fixed geometry that many owners report is more consistent than a poorly adjusted adjustable arm. On those, your levers are the arm height at the pivot, the tracking force, and choosing a cartridge that suits the arm’s design. Shimming under the arm base moves VTA on some fixed arms, but check the manual first, because the arm wires and the counterweight end can make that risky.
Chasing a number instead of a sound. The widely repeated claim is that differences under about 4 degrees are inaudible with a conical or elliptical stylus. If that sounds convenient, it is because for those profiles it largely is. Precision matters most with line-contact and hyperelliptical styli.
One last habit worth keeping: write the reading down with the arm position noted. Documented, repeatable settings are the only way VTA setup stops being guesswork, and they take ten seconds.
Frequently Asked Questions
What is the correct VTA for a tonearm?
There is no single correct VTA, because the target belongs to the cartridge rather than the arm. Many moving-coil cartridges perform best around 20 to 22 degrees, while most moving-magnet designs want 23 to 25. Older high-compliance designs such as the Shure V15 were cut for around 15 degrees. Use the cartridge maker’s published range, and if there is none, start with the cartridge top parallel to the record.
Does changing VTA affect tracking force?
Yes, slightly. The cartridge sits on a lever that pivots at a fixed point, so sliding it forward or backward changes the arm’s effective length and therefore the downforce at the stylus. The shift is usually a few tenths of a gram, which is enough to matter. Zero your tracking-force gauge, recheck it after every VTA move, and correct the dial before listening again.
How do I set VTA without a tonearm protractor?
Use the pivot-point markings printed on many arms, which let you sight along the arm tube from the pivot to the stylus. Otherwise, set the top of the cartridge or headshell parallel to the record with a bubble level or machinist’s square, then treat that as your baseline. For repeatable numbers, feeler gauges between the headshell and the record work without any specialized tool. Borrowing a protractor is still the cleanest option.
Should VTA be set before or after cartridge alignment?
Set the basic VTA first, then do your fine alignment, then confirm VTA again at the end. Alignment templates assume a reasonable vertical angle, so aligning first on a badly set VTA wastes your time and produces a body position that will need undoing. If your protractor or template is fussy about the angle, expect to revisit VTA after alignment and allow for that extra pass.
Why does my cartridge body not match the cantilever angle?
Cartridge bodies are not always parallel to their cantilevers. The body is a mounting surface shaped for the headshell bolts, while the cantilever is a separate part of different compliance, so the two can differ by several degrees by design. A side view under a loupe shows this clearly. Read VTA from the cantilever, since that is what sits in the groove, not from the top of the plastic body.
Conclusion
Start with the cartridge maker’s target range, set tracking force first, and get the cartridge top parallel to the record as your baseline. From there, move the headshell in small steps, play the same track after each change, and stop when the sound is focused rather than when a number looks tidy.
Recheck the angle at the outer record edge, then recheck tracking force, anti-skate, and cueing height so the whole tonearm setup agrees with itself. Write the reading down. The next record you play, and the next time you fine-tune, will both be quicker for it.