
A reel-to-reel tape deck is an analog audio machine that plays and records magnetic tape wound on two open reels, a supply reel and a take-up reel. A capstan and pinch roller pull the tape at a fixed speed past a set of heads, turning sound into magnetic patterns and back again. Collectors care because this is the machine the music industry actually recorded on for decades.
It sounds like a museum piece until you thread a reel and watch it run. Then it makes sense why vinyl people keep ending up here.
This guide covers what the machine is, how the tape moves through it, what the parts do, which formats and speeds matter, how to use one without wrecking it, and what ownership actually involves. As of 2026, decks are still being serviced, rebuilt and sold, so this is a living format rather than a closed chapter.
Table of Contents
- What Is a Reel-to-Reel Tape Deck?
- How Does a Reel-to-Reel Tape Deck Work?
- What Are the Main Parts of a Reel-to-Reel Tape Deck?
- What Kinds of Reel-to-Reel Tape Decks Are There?
- Consumer and domestic decks
- Semi-professional and prosumer decks
- Professional studio decks
- Modern archival and transfer units
- What Tape Speeds and Formats Does It Use?
- Speeds, and why they matter
- Quarter track versus half track
- NAB versus CCIR equalisation
- How Do You Use a Reel-to-Reel Tape Deck Safely?
- How Do You Clean and Maintain a Reel-to-Reel Tape Deck?
- Clean the heads and pinch roller regularly
- Replace the pinch roller before it fails
- Demagnetise periodically
- Be conservative with oil
- Expect calibration
- Know when to stop and call someone
- Handle sticky tapes separately
- Frequently Asked Questions
- Is a reel-to-reel tape deck the same as a cassette player?
- What tape speed should I use for listening to reel-to-reel recordings?
- Can I play 7-inch reels on a 10-inch reel-to-reel deck?
- Why does my reel-to-reel deck sound distorted or quiet?
- Do reel-to-reel tapes work better than vinyl for enjoying music?
- Conclusion
What Is a Reel-to-Reel Tape Deck?
A reel-to-reel tape deck is a magnetic tape machine that uses two open reels instead of a cassette shell. Audio is recorded onto or played back from a moving ribbon of tape pulled at a constant speed, measured in inches per second, by a capstan and pinch roller across a head block. Also called an open reel tape recorder, it was the standard recording format in studios from the late 1940s through the mid-1980s, and it is still used today for mastering transfers and archiving.
In one sentence: a reel-to-reel tape deck pulls magnetic tape off one reel, drags it across a row of heads at a fixed speed, and either records onto it or reads the recording back, then winds it onto the second reel.
Here is what separates a reel-to-reel tape deck from the formats that came after it. The tape is exposed, not enclosed in a plastic shell, so you can handle the reels directly. The machine moves the tape with a mechanical grip rather than a capstan motor alone. It runs at fixed, selectable speeds rather than one fixed speed. And it handles far more tracks and bandwidth than a cassette, which is why studios used it for everything from demo reels to final masters.
The format also has one quirk that trips up beginners. Tape has a single recordable surface, not two sides like vinyl. When people say side A and side B of a reel, they mean the first and second pass along the same strip, not two faces of a disc.
How Does a Reel-to-Reel Tape Deck Work?
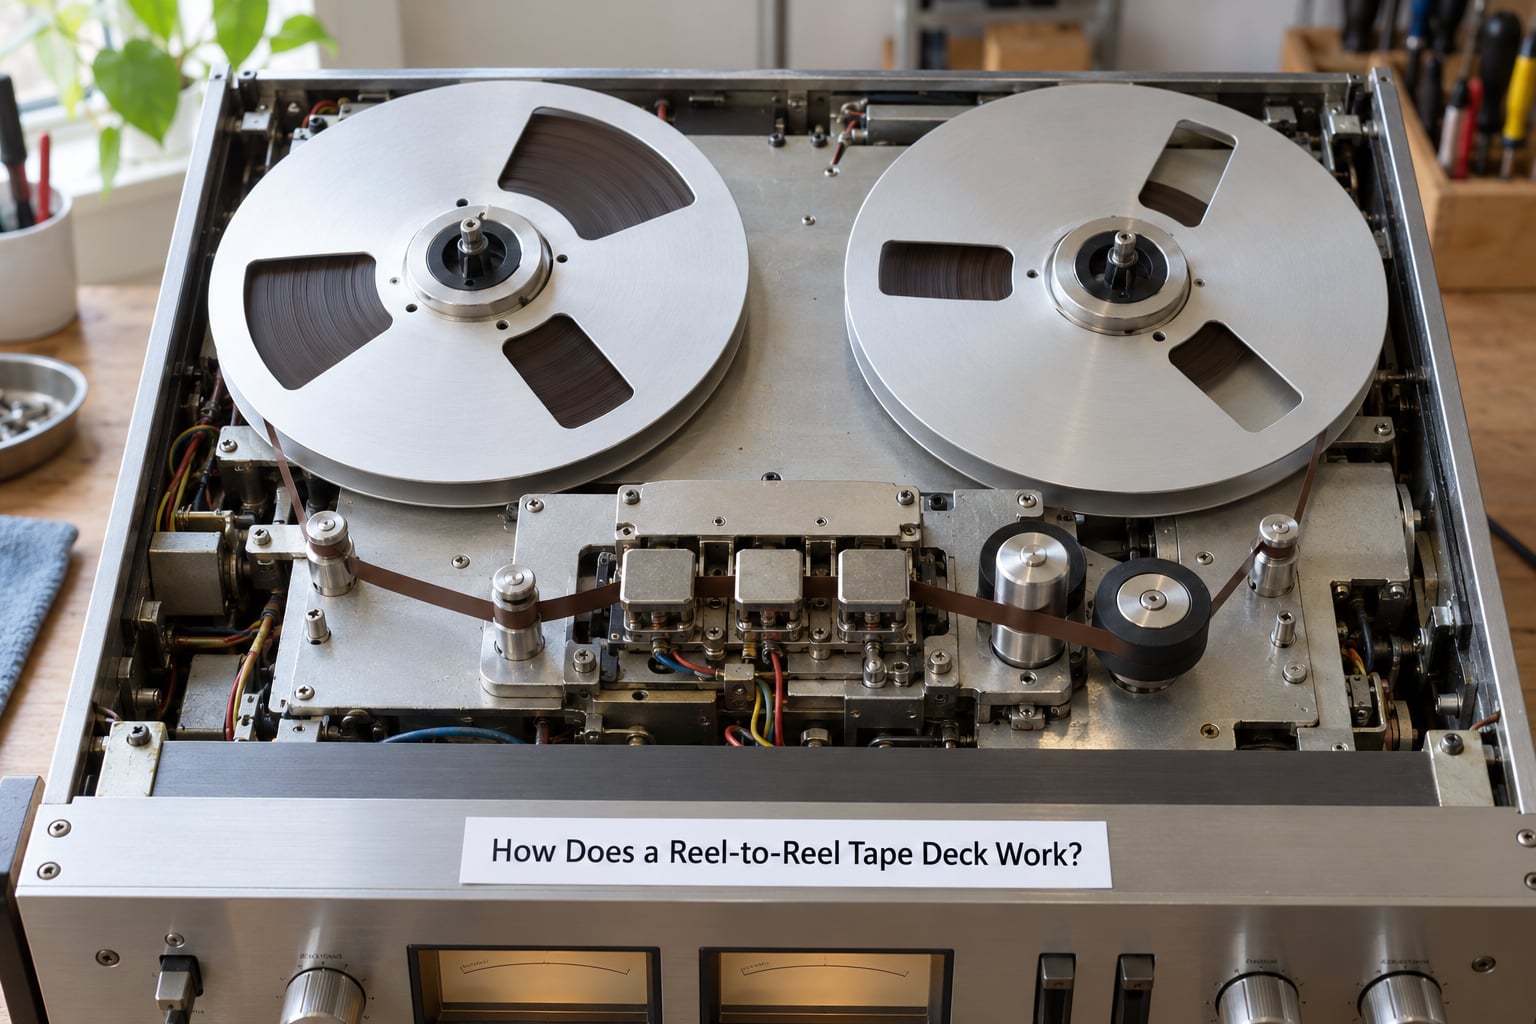
The whole machine is one loop: tape leaves the supply reel, passes a fixed path of guides and heads at a controlled speed, and collects on the take-up reel. Nothing about the loop changes except direction and speed, which is why every deck shares the same core parts.
- Supply reel. The full reel sits on the left hub and pays tape out as the machine runs. Your hand, or the tape tension sensor on a three-motor deck, controls how fast it unwinds.
- Guiders and guides. Metal posts and rollers line the path, holding the tape at a fixed height and angle so it crosses the heads square.
- Erase head. On recording machines, this head floods the incoming tape with a high-frequency magnetic field, wiping old signal off before new signal is laid down. Playback-only decks skip it.
- Record head. This is where your audio meets the oxide. A small changing current in the head’s gap magnetises the coating along the tape’s length, one frame at a time.
- Playback head. The same idea in reverse. As magnetised tape passes the gap, the head picks up a tiny changing voltage, which the electronics amplify back into sound.
- Capstan and pinch roller. The capstan is a rotating metal spindle of a precisely known diameter. The rubber pinch roller presses tape against it, and that is what actually sets the speed. Both are delicate, and both are where a lot of playback trouble starts.
- Take-up reel. The far hub winds the played tape back up under gentle tension so it packs flat and does not crease.
On playback, signal moves head to preamp to line output to your amplifier. On recording, your source feeds a record amplifier, which drives the record head while bias and equalisation circuits shape the frequency response. Two or three heads on the same deck is normal, and many decks let you monitor the record head or the tape itself while recording.
Because tape is pulled by friction rather than by any sensor on the audio signal, speed regularity matters enormously. Speed drift shows up as pitch wander, and flutter, the fast variation in speed, shows up as a wavering or warbling quality. That is also why a deck whose capstan motor is tired can sound worse than a healthy one playing the same tape.
What Are the Main Parts of a Reel-to-Reel Tape Deck?
Once you know the names, any deck becomes readable. Front panel controls move the tape; everything behind the head block either touches the tape or turns its signal into something usable.
- Transport controls. Rewind, fast forward, play, stop, record. On consumer decks these are mechanical piano keys; on studio machines they are relays and solenoids, often with a remote.
- Reel hubs and reel adapters. Most transports accept a 7-inch reel directly and need an adapter for a 10.5-inch NAB reel. Recording decks sometimes take CINE or Trident reels too, so check the hub before you buy.
- Head block. The masked metal assembly holding the erase, record and playback heads in a fixed line, plus the head covers you remove to clean them.
- Tape path and guides. Posts, rollers and tape lifters that keep the ribbon flat and correctly aligned between reels and heads.
- Capstan and pinch roller. The speed-setting pair. The roller is a soft consumable that hardens with age and needs replacing before it takes the tape with it.
- Meters. VU meters show recording or playback level. Older studio decks have calibrated meters you can check against a test tape; consumer decks often have a single small level dial or none at all.
- Level, bias and equalisation controls. Record level per channel, manual or automatic bias, and a switch for NAB or CCIR equalisation. Manual bias that drifts is one of the main reasons a vintage tape sounds dull.
- Inputs and outputs. Line in, line out, and on recorders a record-out or sync output. Playback-only decks frequently omit a way to get signal in, which means you cannot dub from vinyl to tape on them.
- Tension sensor. A small tape flag or optical sensor that detects slack. A three-motor deck uses it to hold steady tension so the reels do not sag or overspin.
What Kinds of Reel-to-Reel Tape Decks Are There?
Decks split into three historical tiers plus a modern fourth category, and the tier tells you almost everything about how a machine will treat you.
Consumer and domestic decks
Sold into homes from the 1960s through the 1970s, often with speakers built into the lid and inputs for microphones and a phono or aux source. Brands like Akai, Sony, TEAC, Sanyo, Toshiba, JVC, Aiwa, Pioneer, Technics and Concord all made them. They are the easiest entry point: usually two or three speeds, quarter-track heads, and a repair shop that can still service them.
Semi-professional and prosumer decks
The tier serious hobbyists live in. Revox A77 and B77, TEAC A-2300SX and X-1000M, Otari MX-5050BII, Pioneer RT-1011 and the rare dual-format decks such as the Technics RS-1500 all live here. Better transport, better meters, manual bias adjustment, and often switchable NAB and CCIR. Some have no record path at all, which catches people out.
Professional studio decks
Studer A80 and A820, Ampex MM-1000, Otari MX-5050 8-track and Nagra IV-S are studio machines. Wider tape, more tracks, higher speeds, heavier construction, and often no built-in monitoring at all. They are superb and enormous, and they assume a rack, a room and a technician.
Modern archival and transfer units
There are still machines built and rebuilt for moving audio off tape and onto a computer. Revox has been offering refurbished B77 units, and newer enthusiast machines such as the Ballfinger target people who want a small, quiet deck close to a listening room rather than a studio. The advantage is obvious: these are made for play, not for tracking eight channels at once.
What Tape Speeds and Formats Does It Use?
Tape formats vary along four axes at once: width, reel size, track layout and speed. Get any of them wrong and the deck either will not play the tape or will play it wrong.
| Format | Width | Typical reel | Track layout | Common speed | Equalisation |
|---|---|---|---|---|---|
| Home and cassette-era dub | 1/4 inch | 7 inch | Quarter track | 3 3/4 or 7 1/2 ips | NAB or CCIR |
| Pre-recorded stereo album | 1/4 inch | 7 or 10.5 inch | Half track | 7 1/2 ips | NAB |
| Master tape release | 1/4 inch | 10.5 inch NAB | Two track | 15 ips | NAB |
| Studio multitrack | 1/4 inch | 10.5 inch | 8 or 16 track | 15 ips | NAB or CCIR |
| Professional stereo master | 1/2 inch | 10.5 or 14 inch | 4 or multi track | 15 or 30 ips | NAB |
| Broadcast and mastering | 1 inch and 2 inch | 14 inch and up | 8 to 24 track | 15 or 30 ips | NAB or CCIR |
Speeds, and why they matter
Common speeds are 1 7/8, 3 3/4, 7 1/2, 15 and 30 inches per second. Each doubling gives you double the tape per minute and a shorter, wider signal for the same audio, which means less hiss, more headroom and better high frequencies. A 15 ips master dub has roughly four times the bandwidth of the same programme at 3 3/4 ips.
That improvement is not free. At slow speeds, high frequencies get squeezed and tape hiss dominates; wow and flutter is also more audible because any speed variation is a larger fraction of the pass. At 15 ips, long-passage hiss disappears and the recording opens up. Owners switching between speeds on the same deck hear the difference immediately, and it is the single most persuasive argument for owning one.
Quarter track versus half track
This is the thing beginners get wrong most often. Quarter track splits the tape’s width into four narrow tracks, recording two in each direction, so it is the format for multitrack and home recording. Half track, also called two track, uses two wide tracks, one per stereo channel. Half track wins on fidelity, which is why commercial pre-recorded albums and master tape releases are half track.
Here is the trap: most consumer decks are quarter track, and most good tapes you want to play are half track. A quarter-track head simply will not read a half-track recording properly. Only a handful of machines handle both formats, among them the Technics RS-1500 and RS-1506, the Otari MX-5050BII and the TEAC X-1000M. If half-track playback matters to you, check the head block before you buy, because the deck you choose locks you to a format permanently.
One more confusion to clear up: half track is not the same as half inch. A half-track recording can be on 1/4 inch tape. Track count and tape width are separate dimensions.
NAB versus CCIR equalisation
Equalisation is the tone curve a machine applies. Play a NAB tape on a machine set to CCIR and it sounds dull and bass heavy; play a CCIR tape set to NAB and it sounds thin and bright. Cheap decks have no switch, which means they are locked to one standard, and outboard tape head amplifiers exist for exactly this reason. If you own a lot of tapes from one era, matching the standard is the difference between a faithful reproduction and a wrong one.
How Do You Use a Reel-to-Reel Tape Deck Safely?
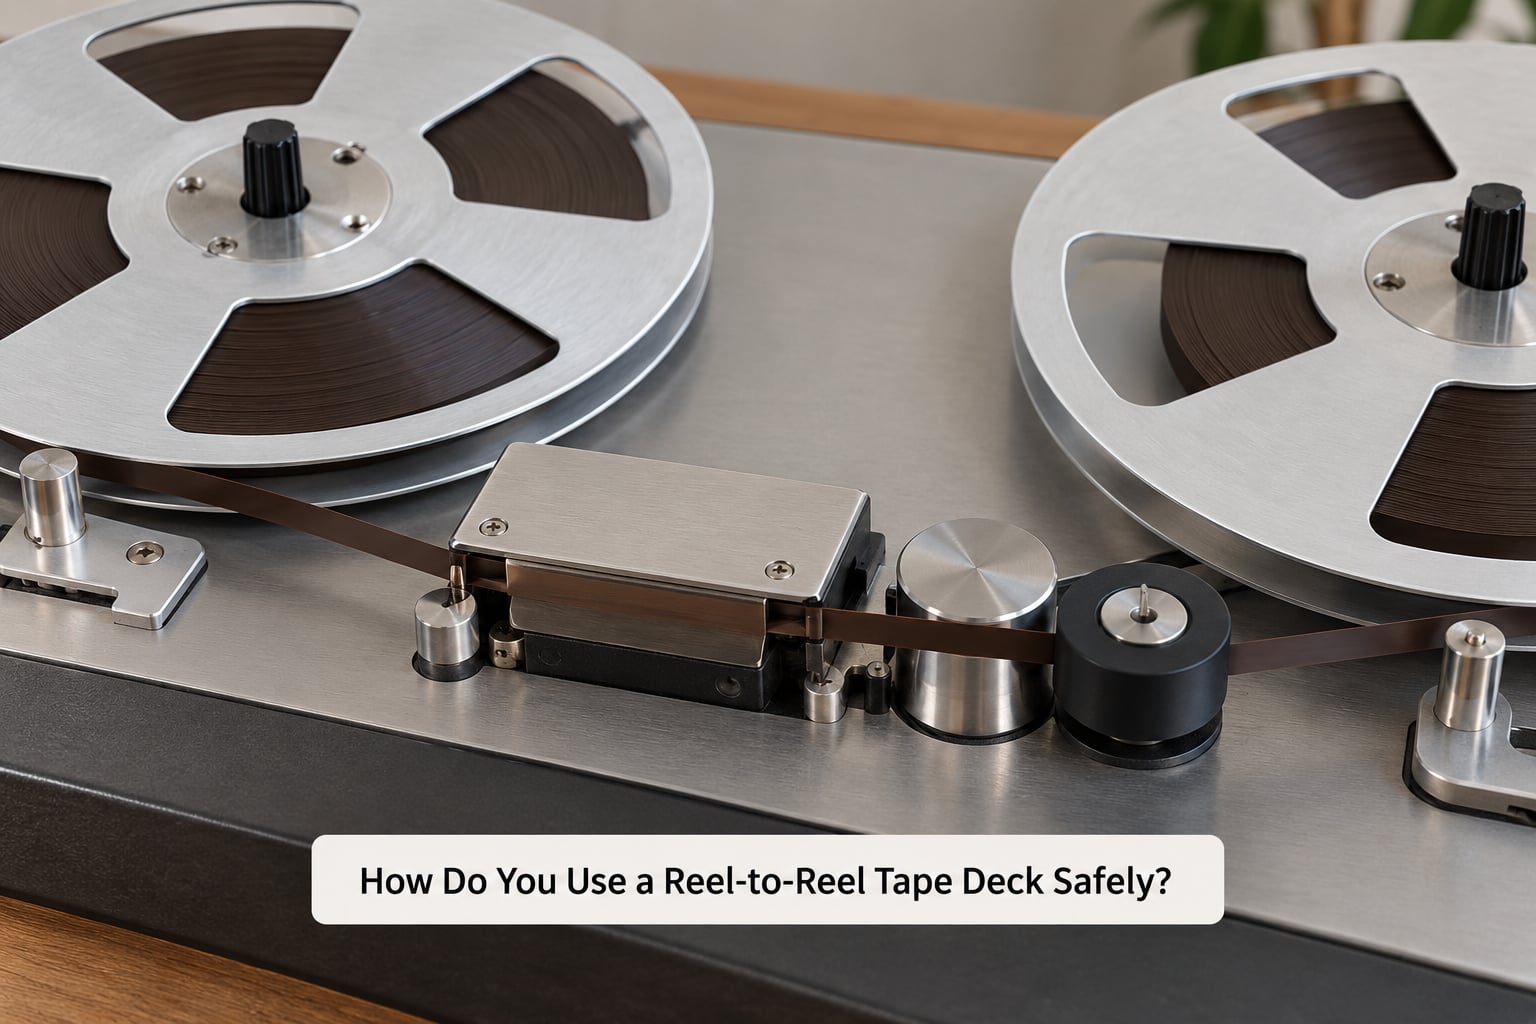
A reel-to-reel tape deck will happily destroy a bent tape, a hardened pinch roller or a reel that is not threaded with the right tension. Ten careful minutes on the first session saves a lot of money later.
- Inspect the deck first. Look for rust, a hardened or shiny pinch roller, and a supply reel that spins loosely. Check the tape path for sticky residue before anything else.
- Clean before you play. Heads, guides, capstan and pinch roller get isopropyl alcohol on a lint-free swab or cotton bud. Old decks are usually filthy.
- Demagnetise. Run a tape head demagnetiser over the heads before the first tape of the session. Magnetised heads are a common cause of muffled or thin playback.
- Mount the reel. Put the supply reel on the left hub, the take-up reel on the right, and add an adapter if the reel needs one. Make sure both turn freely and are the same size.
- Thread with tension. Run roughly a foot of tape out from the supply reel and anchor it to the take-up reel hub before threading, so the tape is never left slack. Then draw the ribbon across the guides and through each head gap in order, ending under the capstan and around the pinch roller.
- Set the speed first. Choose the speed that matches the tape. Guessing here is how a half-track master ends up played at the wrong speed and left as a wobbling mess.
- Set level before playing. Bring the volume all the way down, start the transport, then bring it up slowly. A click or a thump when a machine starts is normal; a constant crackle is not.
- Stop and rewind gently. Use the stop button or brake rather than grabbing the reels. For a half-hour reel, fast forward back to the start rather than rewinding every time.
- Store the tape inside out. Wind it back on the supply reel if the machine lets you, and keep it in a plastic sleeve in a dry room away from direct sun. Humidity is what drives oxide shedding.
If a tape was stored in an attic or a damp basement, slow down. Look for a faint powdery residue on the reel and a smell you cannot place. That combination means sticky shed syndrome, and the tape has to be treated before it goes near your heads.
How Do You Clean and Maintain a Reel-to-Reel Tape Deck?
Maintenance is the honest reason people either fall in love with this format or walk away from it. A vintage deck is a mechanical device with rubber parts, and rubber ages whether you use it or not.
Clean the heads and pinch roller regularly
Every few hours of play, ideally more often if you handle tapes with dusty fingers. Open the head covers, swab the head faces, the guides, the capstan and the pinch roller with 99 percent isopropyl alcohol. Keep the alcohol off the rubber pinch roller and off any plastic, and never use a metal tool near a head gap. Dirt on the heads dulls treble and hurts the record path more than the playback path.
Replace the pinch roller before it fails
The pinch roller is a consumable. It hardens, develops a flat spot and grips unevenly, which causes speed wobble and can crease or shed tape. Check for a shiny, glazed or cracked surface. Replacing it is a cheap job compared with the cost of a reel you never got to play.
Demagnetise periodically
Magnetisation builds up on heads and steel parts. A cheap demagnetiser used every few dozen sessions is sensible, and it should be done with the tape removed from the machine. Never demagnetise with a tape threaded.
Be conservative with oil
Older lubricants thicken and gum up, and oil on a capstan or a belt can spread onto the tape. Use only what a technician recommends, and never oil the pinch roller or the capstan shaft yourself. A deck that has been stored for decades often needs its lubricants replaced rather than added to.
Expect calibration
Record level, playback level and bias all drift. A serviced deck gets its record level checked against a reference fluxivity tape and its playback level against a calibration tape, then the meters are set to read zero VU for the zero-VU reference level. If your deck records quiet or plays thin and one channel is lower than the other, calibration is the first thing to consider, not the tape.
Know when to stop and call someone
A transport that will not hold speed, a capstan motor that will not start, a reel that wobbles, or a machine that needs record alignment or head azimuth adjusted, all belong on a bench with test tapes and an oscilloscope. Long-term owners on enthusiast forums consistently recommend a technician for anything beyond cleaning and demagnetising, and they are right.
Handle sticky tapes separately
Sticky shed syndrome happens when the binder in older tape absorbs moisture and turns gummy. Play it and the tape leaves residue on heads and pinch rollers and sounds muddy. Options include baking, which involves heat and is risky, a professional treatment service, or playing the tape once at a low speed to see whether it sheds. Many collectors simply digitize such tapes and keep the originals in sleeves.
Frequently Asked Questions
Is a reel-to-reel tape deck the same as a cassette player?
No. Both play magnetic tape, but a cassette player runs one fixed speed inside a plastic shell with the tape hidden. A reel-to-reel tape deck exposes the tape on two open reels, runs it at several selectable speeds, and uses wider track layouts that carry far more audio. That is why studio work, mastering and archiving were done on reel-to-reel while cassettes stayed in homes and cars.
What tape speed should I use for listening to reel-to-reel recordings?
Match the tape to what it was recorded at, which is usually stated on the reel or the sleeve. Home and pre-recorded quarter-track albums are commonly 3 3/4 or 7 1/2 ips. Master tape releases are generally half track at 15 ips. Setting a tape to the wrong speed is the number one cause of distorted, muffled or oddly fast playback, and it is fully reversible if you stop before rewinding.
Can I play 7-inch reels on a 10-inch reel-to-reel deck?
Usually yes, on the deck side. Most transports accept a 7-inch reel directly and use an adapter for a 10.5-inch NAB reel. The reverse is harder: a small-spool deck may not have the torque to drive a full 10.5-inch reel, which is why consumer machines tend to be 7-inch capable and professional machines handle both. Check the reel hub style too, since CINE and Trident hubs need their own adapter.
Why does my reel-to-reel deck sound distorted or quiet?
Work down a short list. Dirty or magnetised heads and a hardened pinch roller cause most of it, and both are cheap to deal with. Wrong equalisation, with a NAB tape on a CCIR setting, sounds dull or thin. A failing channel that has not been seen in decades usually needs electronics work. And if the machine has not been calibrated, record and playback levels can sit well below where they should.
Do reel-to-reel tapes work better than vinyl for enjoying music?
It depends on the tape and what it was cut from. A high-speed master tape dubbing of an album can be more revealing than a worn pressing, because the master sits closer to the mix. Skeptics argue that an identical uncompressed digital file wins on distortion and bass, and that tape’s reputation comes largely from mastering practices before modern compression. Either way, you cannot skip to a track, and the library is small.
Conclusion
A reel-to-reel tape deck is a mechanical tape machine with two open reels, a fixed speed set by a capstan and pinch roller, and heads that record and read magnetic patterns on the tape’s single surface. It was the working format of the music industry for most of the twentieth century, and it is still used for mastering transfers and archiving.
If you are just starting out, look at three things in this order. First, the head block: quarter track or half track decides which tapes you can ever play, and that choice cannot be changed later. Second, the transport: a capstan motor that holds speed and a pinch roller that is not hardened. Third, the controls: whether it has a record path and an equalisation switch, which decides whether you can dub from vinyl and which tapes play correctly.
Then be honest about the rest. Cleaning is routine, calibration and electronics work belong to a technician, and the library of available music is small compared with vinyl. Owners who stick with it anyway tend to be the same people who care about record cleaning and needle setup: it is the maintenance and the ritual, not just the sound.